School of (FV) Systems
Learn to Work with and Think in Systems
Welcome to the School of (FV) Systems! I’m happy you’ve joined us and are ready to embark on a journey through lessons crafted from decades of experience in learning, teaching, and applying flexible system design.
As we begin, I’d like to share three important guidelines to help you succeed:
1. Take Your Time:
Remember, learning is a marathon, not a sprint. I’ve worked hard to filter out the noise and provide you with a concise version of the relevant contemporary design methods. However, it’s essential for you to give yourself the time to absorb these lessons. Embrace the process—practice, reflect, fail, and ultimately discover your unique way of applying what you’ve learned.
2. Be Critical of Your Tools:
It’s easy to get attached to a particular tool, but tools are just that—temporary aids. Tools come and go. They can also be limiting. A strong system can be designed and implemented with any set of tools. Understanding how to use tools is different from understanding how to design. So, always question your tools and stay flexible in your approach.
3. Enjoy the Journey:
It might feel counterintuitive, but immediate results aren’t always the best measure of success. Real creative growth is hard. You need to challenge yourself to venture into the unknown, the uncharted territory where no one has gone before. Yet, you need to find ways to enjoy this adventure. Embrace failure, dare to stray from the safe path of my lessons, and relish the moments when you discover something new. Be proud of your progress.
Let’s dive in and start this exciting learning journey together!
All Available Courses
To access my courses and course-related (footnote) articles, you need to sign up at Patreon. To see what you will get by signing up, go to my PATREON page. Thank you!


Get Started!
Not sure how and where to begin? I’d warmly suggest starting with the 6€ Supporter tier. It’s a great way to dive into learning the essential concepts of Flexible Visual Systems Design right from the start.
Foundation Course
The Foundation Course compiles the essential lessons you need before you take the other courses. Without a basic understanding of what a Visual Identity and a Visual System is and how Flexible Visual Systems change your design approach, it will be hard to follow the approaches of the advanced courses.
Lesson 1: What is an Identity?
Lesson 2: Identity Vs Image
Lesson 3: What is a Visual Identity?
Lesson 4: What is a Visual System?
Lesson 5: Change of Approach
Lesson 6: How do FVS work?
Lesson 7: The FVS Model
Lesson 8: The FVS Manifesto explained
Once you’ve completed the foundation course, moving up to a 12€ Student tier is the right choice. This upgrade grants you access to all past and future courses, along with our vibrant Discord community, offering a more enriched learning experience. I recommend taking the courses in the following order:
| Level | Foundational | Core | Master |
| Beginner | What Is a FVS? Visual Identities, Flexible Systems, and The FVS Model | Historic Systems The Manual, The Template, The Kit and The Program | Modular Type Design Type Follows Function, Follows Grid, Follows Components |
| Beginner | The CAA Method The Most Popular Visual Identity System | Modular Variable Fonts Emergent Identities With Variable Font Design | |
| Intermediate | Systemic Creativity Zwicky, Gerstner and The Morphological Box | WIP: Coding Systems An inductive approach of emergent identities | |
| Intermediate | Grids as Transformational Tools Using Grids Right By Using Them Wrong | ||
| Advanced | WIP: Motion Identities — Kinetic Behaviours and Generative Animations |
History Course
In this course, we are going to look at the history of systems in graphic design. Looking back is helpful to understand why we are where we are at the moment. What needs to change and what should be conserved? The History Course, having a strong focus on Visual Identities, Typography, and Type Design is a perfect foundation course for any practical course.
Lesson 1: Introduction
Lesson 2: Designing Languages
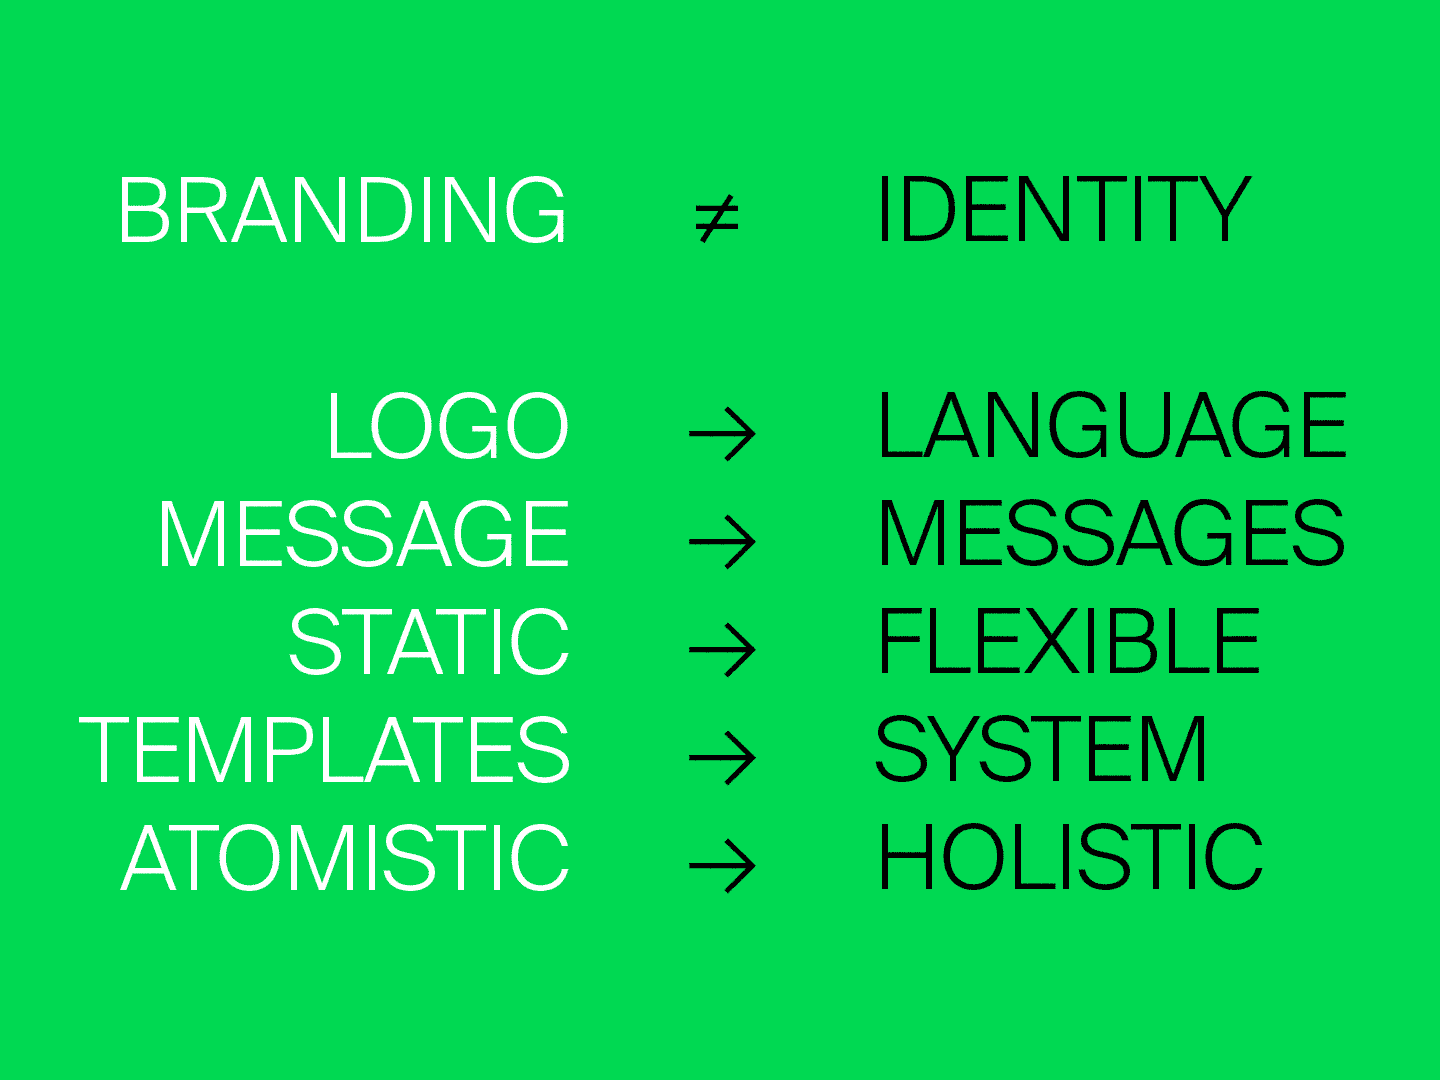
Lesson 3: Logo ≠ Visual Identity
Lesson 4: Why Identities became more flexible?
Lesson 5: Are FVI’s a new thing?
Lesson 6: The Design Manual
Lesson 7: The Design Template
Lesson 8: The Construction Kit
Lesson 9: The Program
Lesson 10: How do contemporary FVI’s work?
Lesson 11: Summing Up & Final Project

Lesson 1: Introduction
Looking back is helpful to understand why we are where we are at the moment, but also to make sure there is something worth rescuing from the past to the present. Let’s start by defining what a Visual Identity is.
Lesson 2: Designing Languages
What we are witnessing is not just a trend, but a shift in how organizations, institutions, and corporations are communicating. The Visual Identity is changing its mechanisms.

Lesson 3: Logo ≠ Visual Identity
Many still consider the logo to be the centerpiece of a Visual Identity, if not the entire Visual Identity. But slowly our way of thinking is changing.
Lesson 4: Why Identities became more flexible?
There has been a fast-growing interest in FVI’s in the last decades, with lots of design studios starting to abandon the idea of the logo as the centerpiece of a VI, instead dedicating their practices to the development of visual systems for FVI’s.
Lesson 5: Are FVI’s a new thing?
Even though the application of a Flexible Visual System might have been harder in the pre-Internet, or even pre-screen era, you can find many examples of Flexible Visual Systems in the history of design- and non-design-related disciplines.
Lesson 6: The Design Manual
Design manuals have been created ever since a design needed to be applied by someone other than the original designer. The manual gives strict instructions about the proportions of a design. Often geometric constructions such as grids are used in order to be as precise as possible.
Lesson 7: The Design Template
While a design manual is merely a guide to reconstructing a specific design and contains the possibility of interpretation, a template does not allow any deviation from the master design.
Lesson 8: The Construction Kit
Limiting the number of elements a design is composed of isn’t just an economical decision. It also simplifies the overall appearance and makes its recognition easier.

Lesson 9: The Program
In 1964, Gerstner wrote a book called Designing Programmes. While the previous types I mentioned deal with tangible objects, Gerstner’s ideas are intangible at first. Rather than drawing concrete shapes, Gerstner designs programs that generate forms.
Lesson 10: How do contemporary Flexible Visual Identities work?
Although Gerstner’s approach comes pretty close to a contemporary Flexible Visual Identity, there is something he apparently did not see coming.

Lesson 11: Summing Up & Final Project
In this last lesson, I want to sum up what you have learned, a chance to go back if you think you missed something, and give you a final assignment that makes use of some of what you have learned.

Systematic Creativity Course
This course will make your creative process more efficient and effective without taking any of the creative freedom you need. It helps you to focus, go deeper in your exploration, make the design process transparent, identify key elements, and distinguish between the ones that work and the ones that make the result weaker. Becoming more creative, by becoming more systemic.
Lesson 1: Systematic Creativity, an Oxymoron?
Lesson 2: System Theory
Lesson 3: Limitation
Lesson 4: Iterations
Lesson 5: Fritz Zwicky
Lesson 6: Karl Gerstner
Lesson 7: A box for FVS
Lesson 8: Summing Up & Final Project

Lesson 1: Systematic Creativity, an Oxymoron?
Systematic creativity makes your work more efficient and effective, without taking away any of your creative freedom. On the contrary, it will boost your creativity.
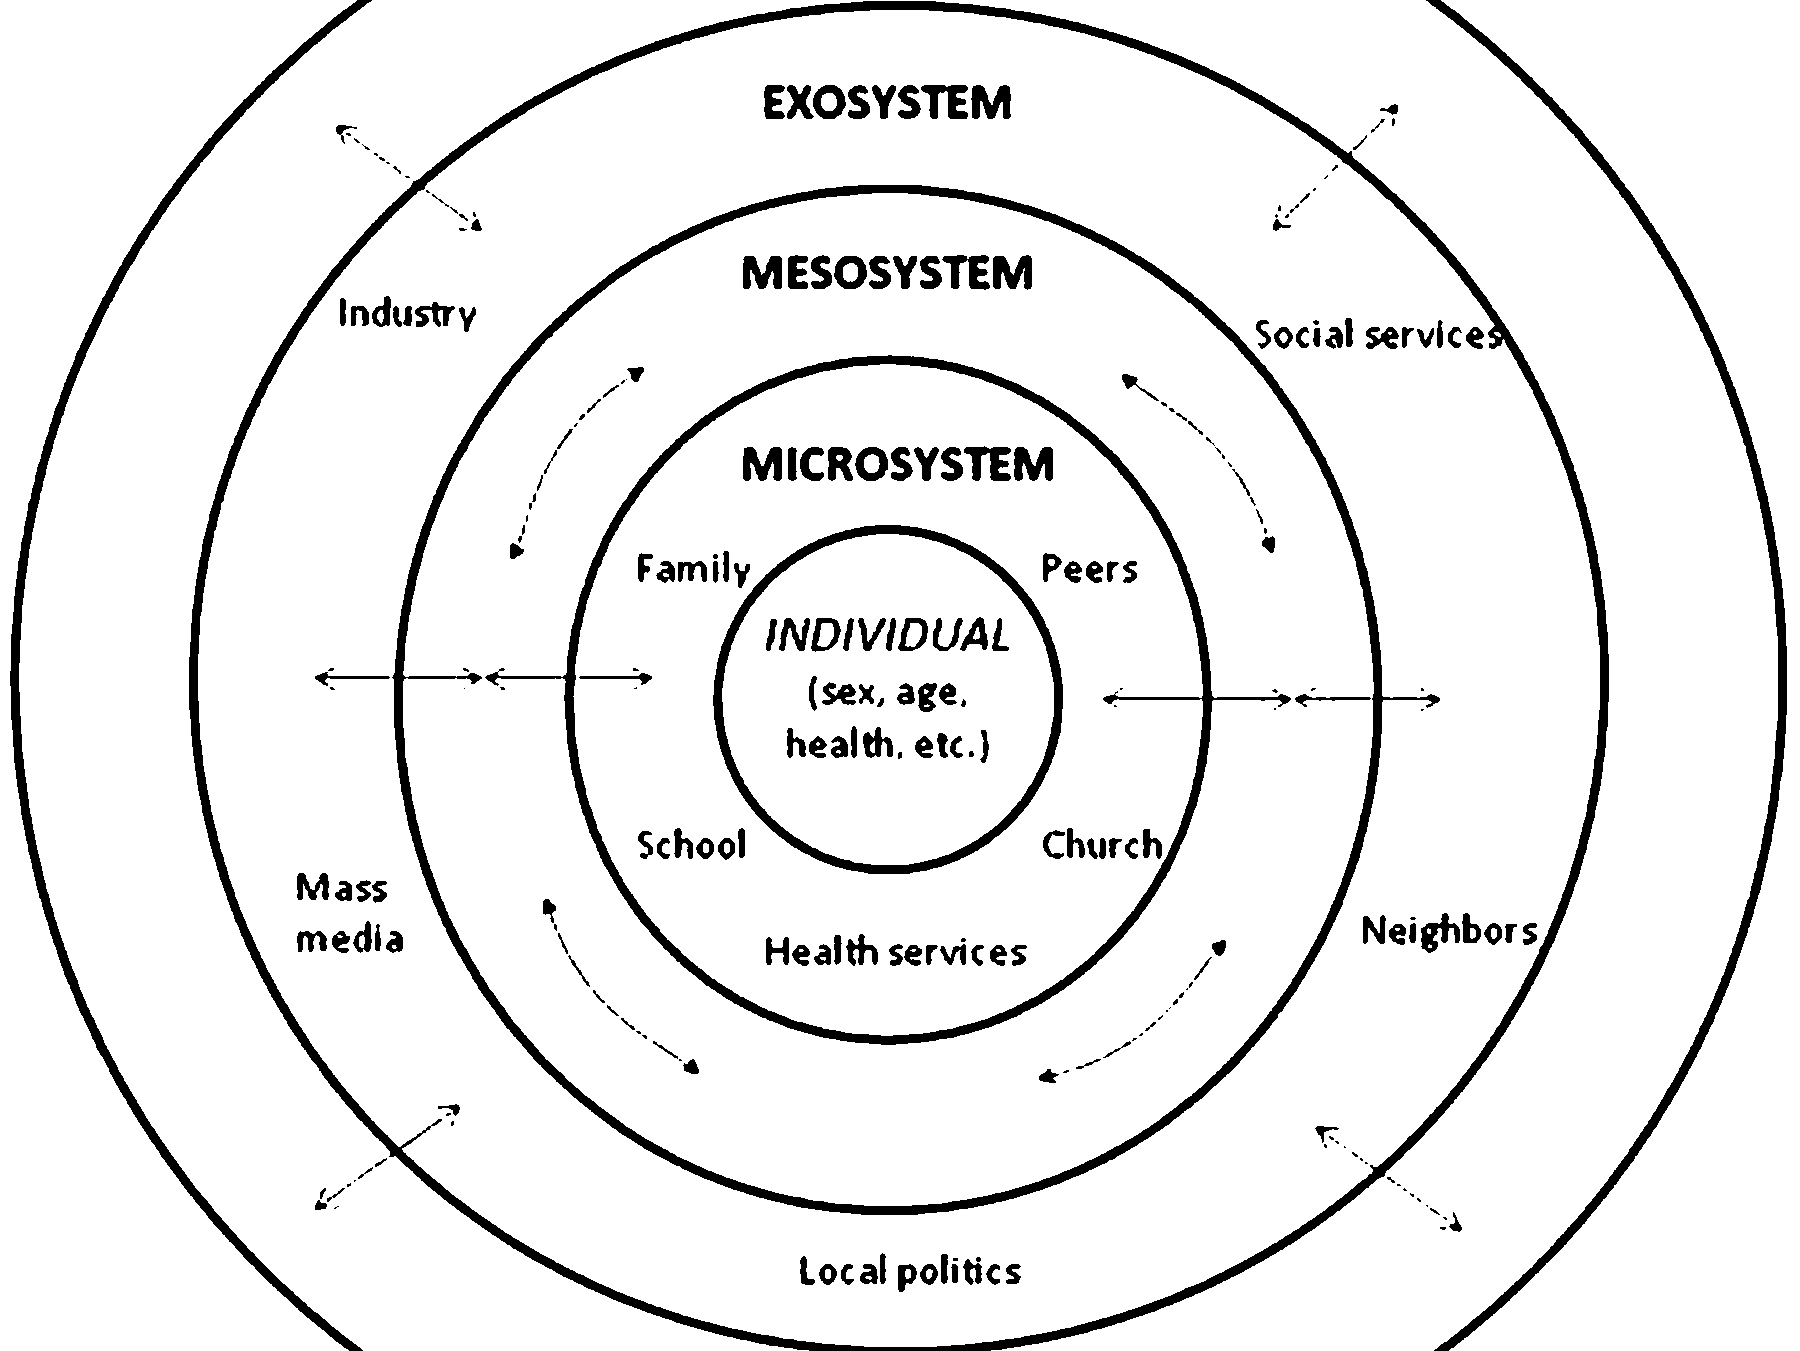
Lesson 2: System Theory
If System Theory leads to System Thinking, System Design should lead to System Doing.
Lesson 3: Limitation
Have you ever limited yourself to one color scheme, one set of pens, one software, a small number of shapes, or one typeface? If you have, you probably have developed, consciously or unconsciously, a system.

Lesson 4: Iterations
Systems can become very complex, and possibilities are endless, so how do I not get lost?
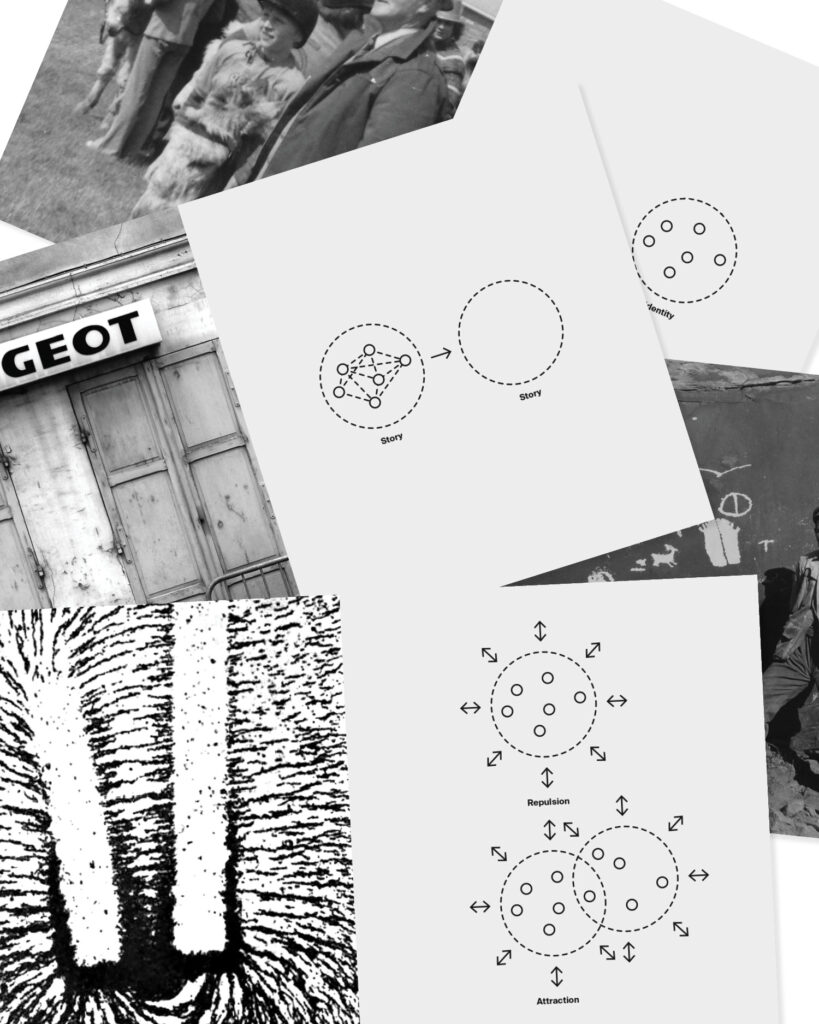
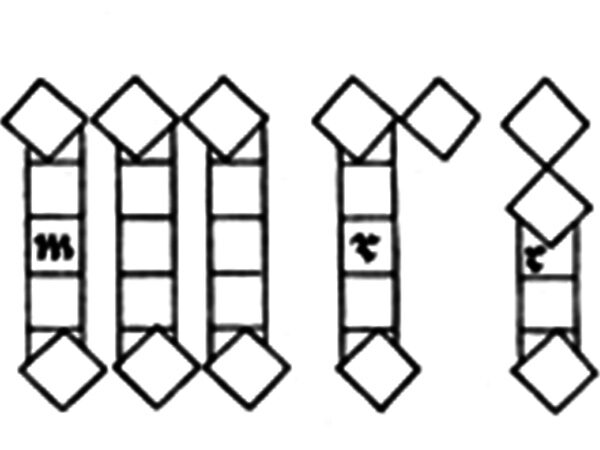
Lesson 5: Fritz Zwicky
Even the search for the variables you want to use can be systematic. Instead of picking them randomly, you can work with a morphological box to become aware of all the possibilities, before you pick one consciously.

Lesson 6: Karl Gerstner
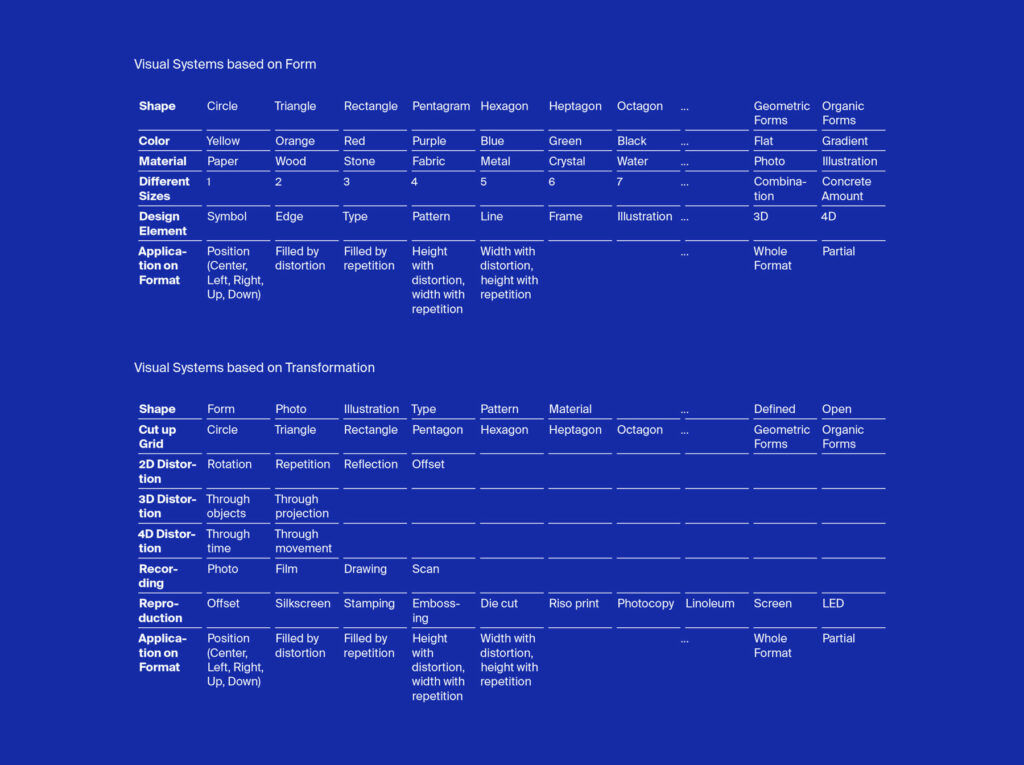
You can’t add more parameters to the box because it only has three axes. The only way to add more parameters is to convert the cube into a plane, or a table, and use the rows for the parameters and columns for the values of the parameters.

Lesson 7: A box for FVS
The morphological box of Gerstner I showed in the last lesson is from the book “Designing Programs”. Its purpose was, besides explaining how the morphological box method by Zwicky works, to show the options a designer has when designing wordmarks. But knowing how design has moved on since the sixties, towards less logo-based and more systems-based visual identities, I was wondering what a morphological box for flexible systems for visual identities might look like.
Lesson 8: Summing Up & Final Project
The lessons of this course should have made your creative process more efficient and effective without taking any creative freedom from you. It should have helped you to learn to focus, go deeper in your exploration, make the design process transparent, identify key elements, and distinguish between the elements that are essential to your work and the ones that make the result weaker. If not, here is a summary of all lessons to make it easier for you to go back and repeat a lesson. … and a final project! 🙂
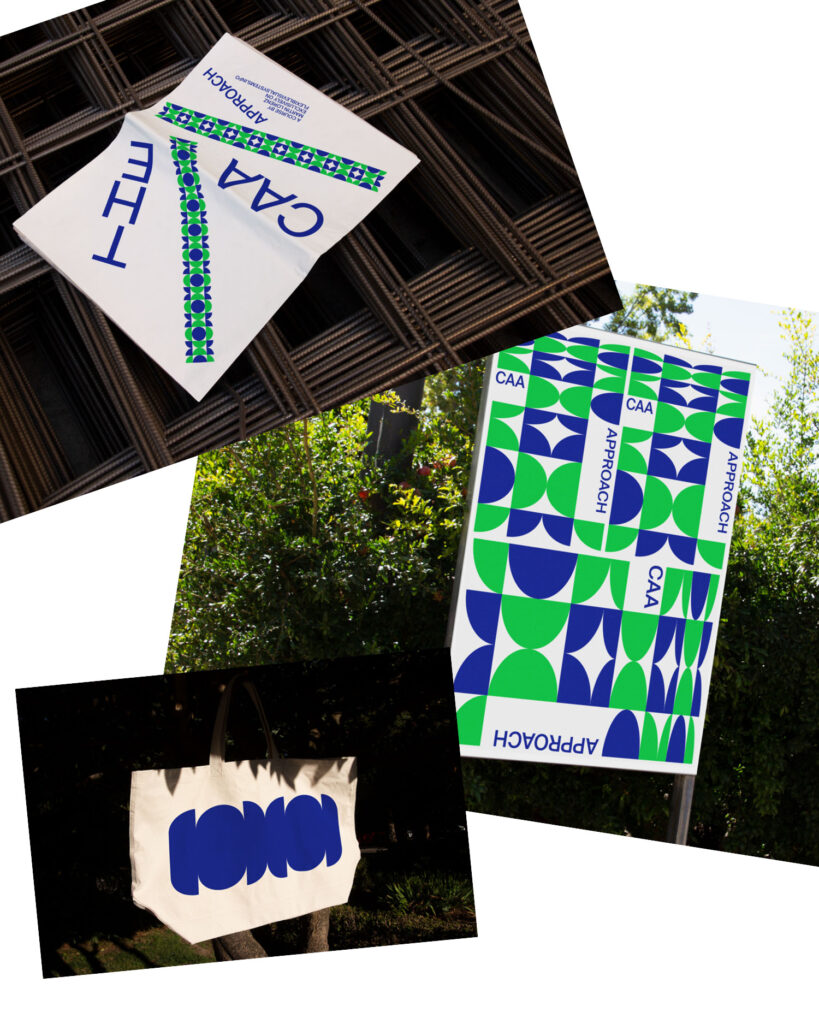
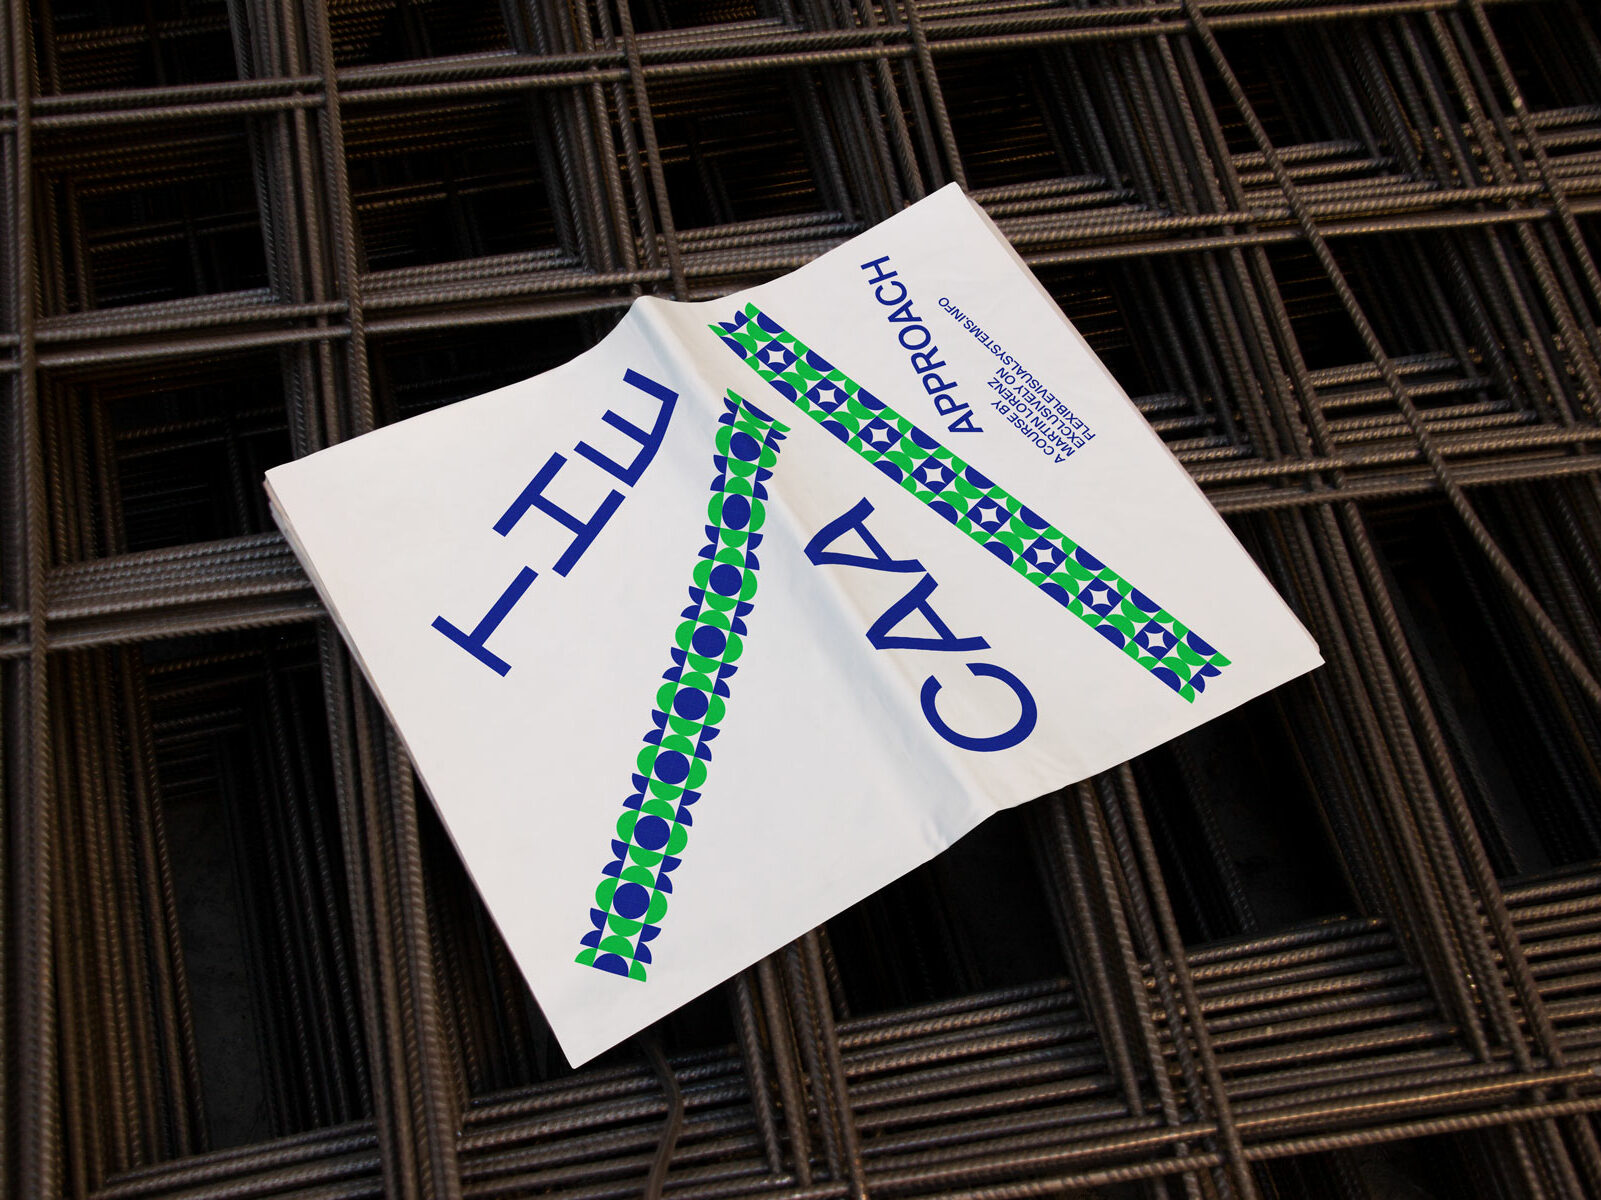
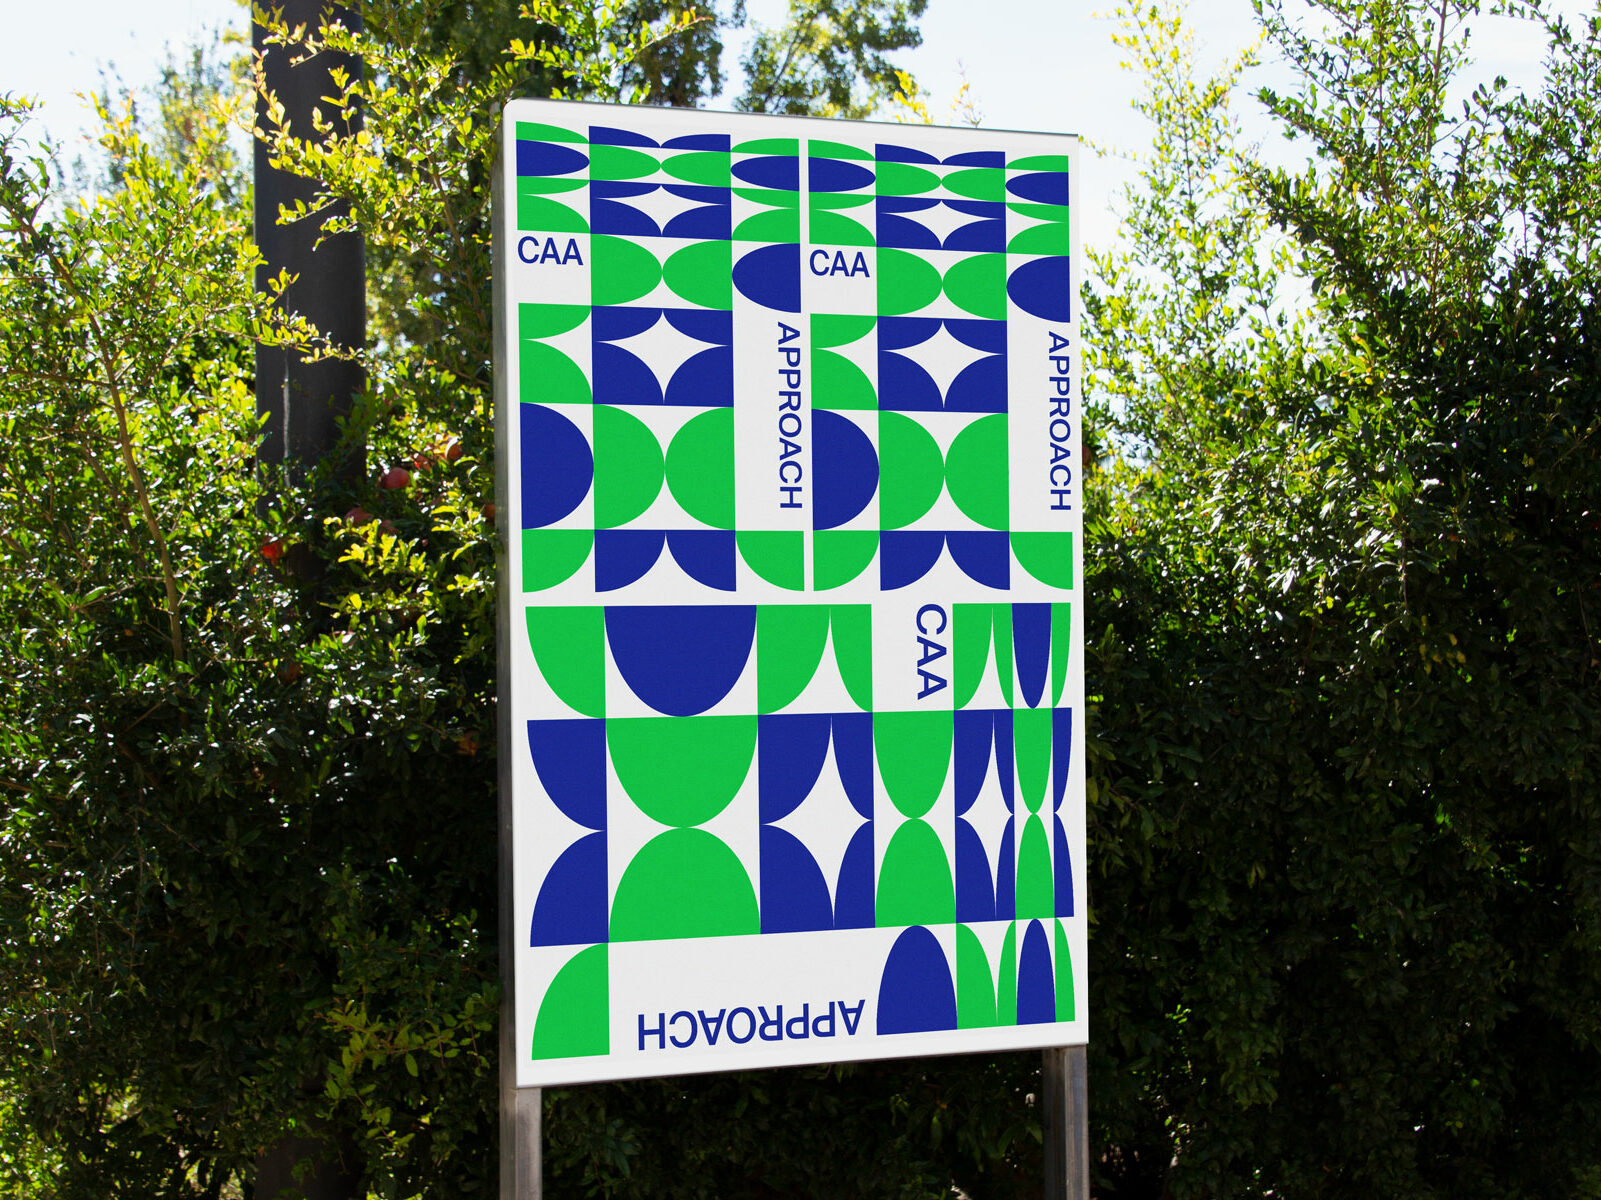
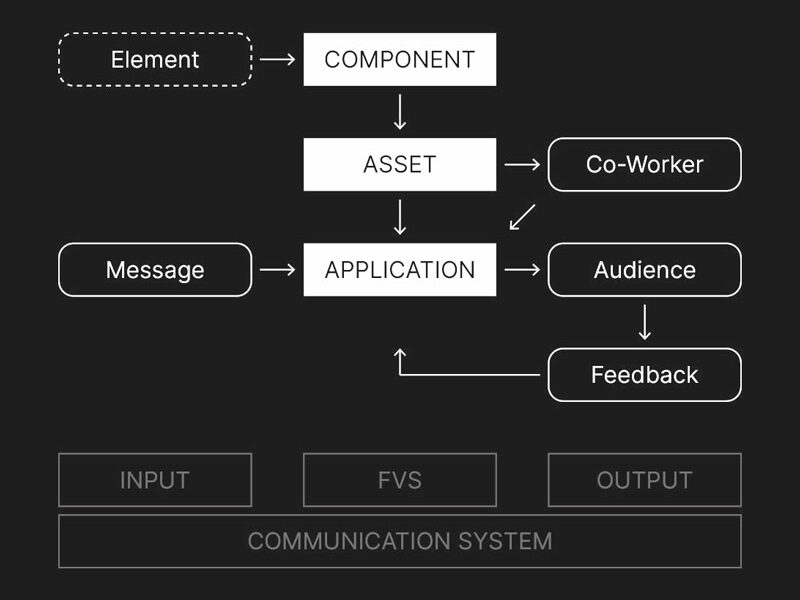
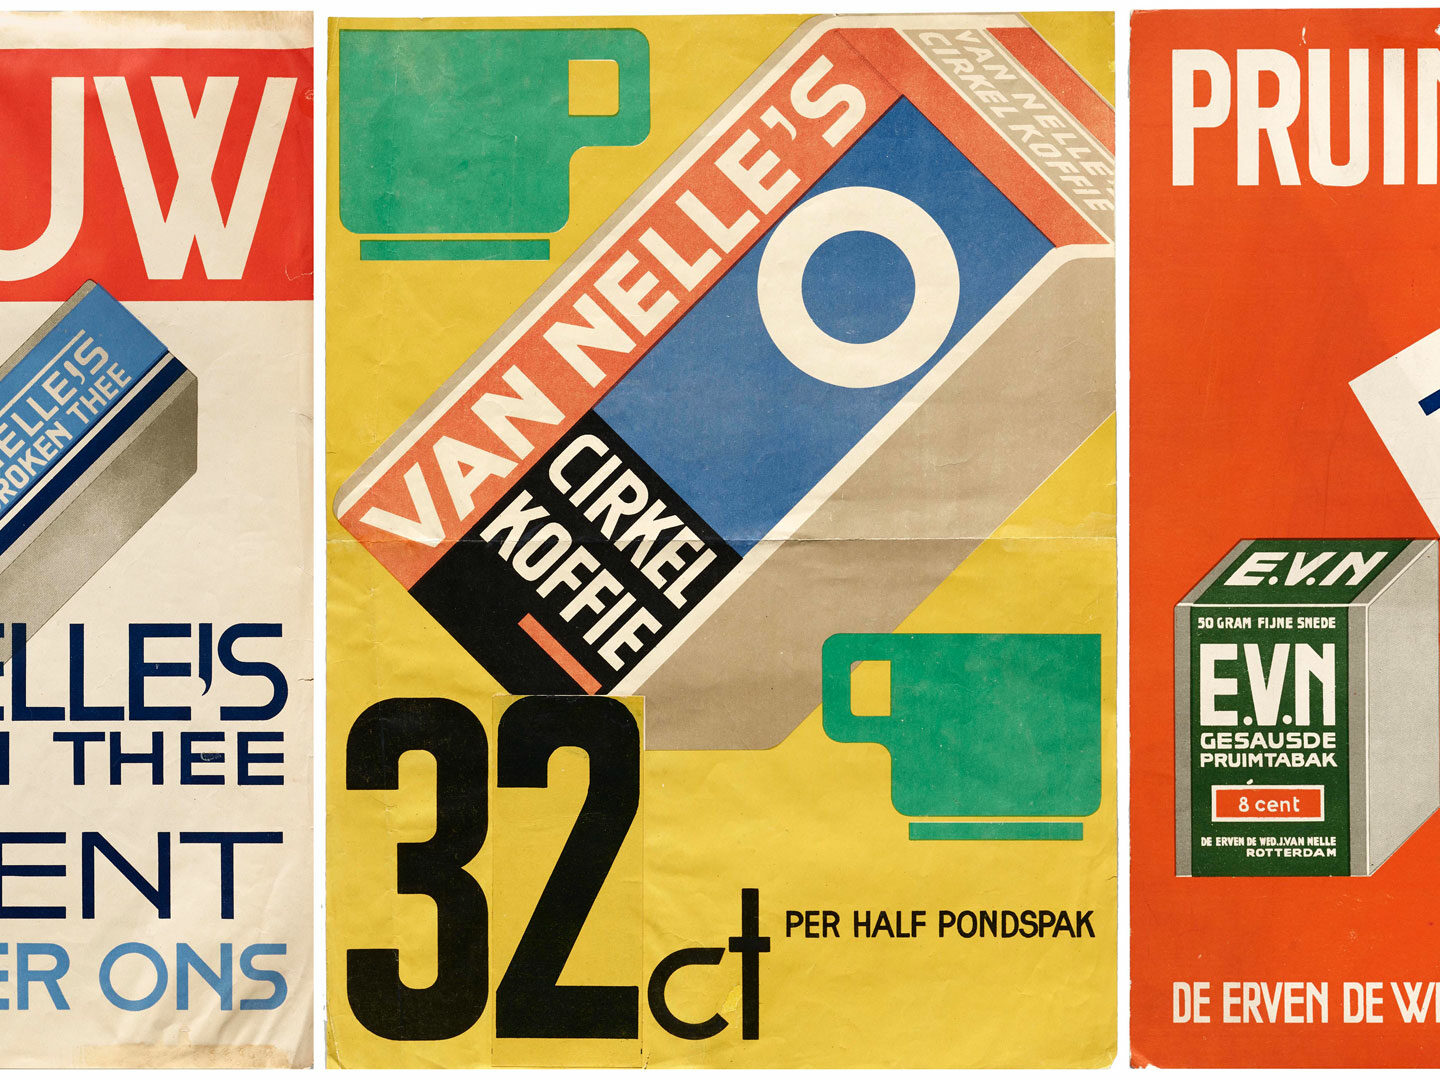
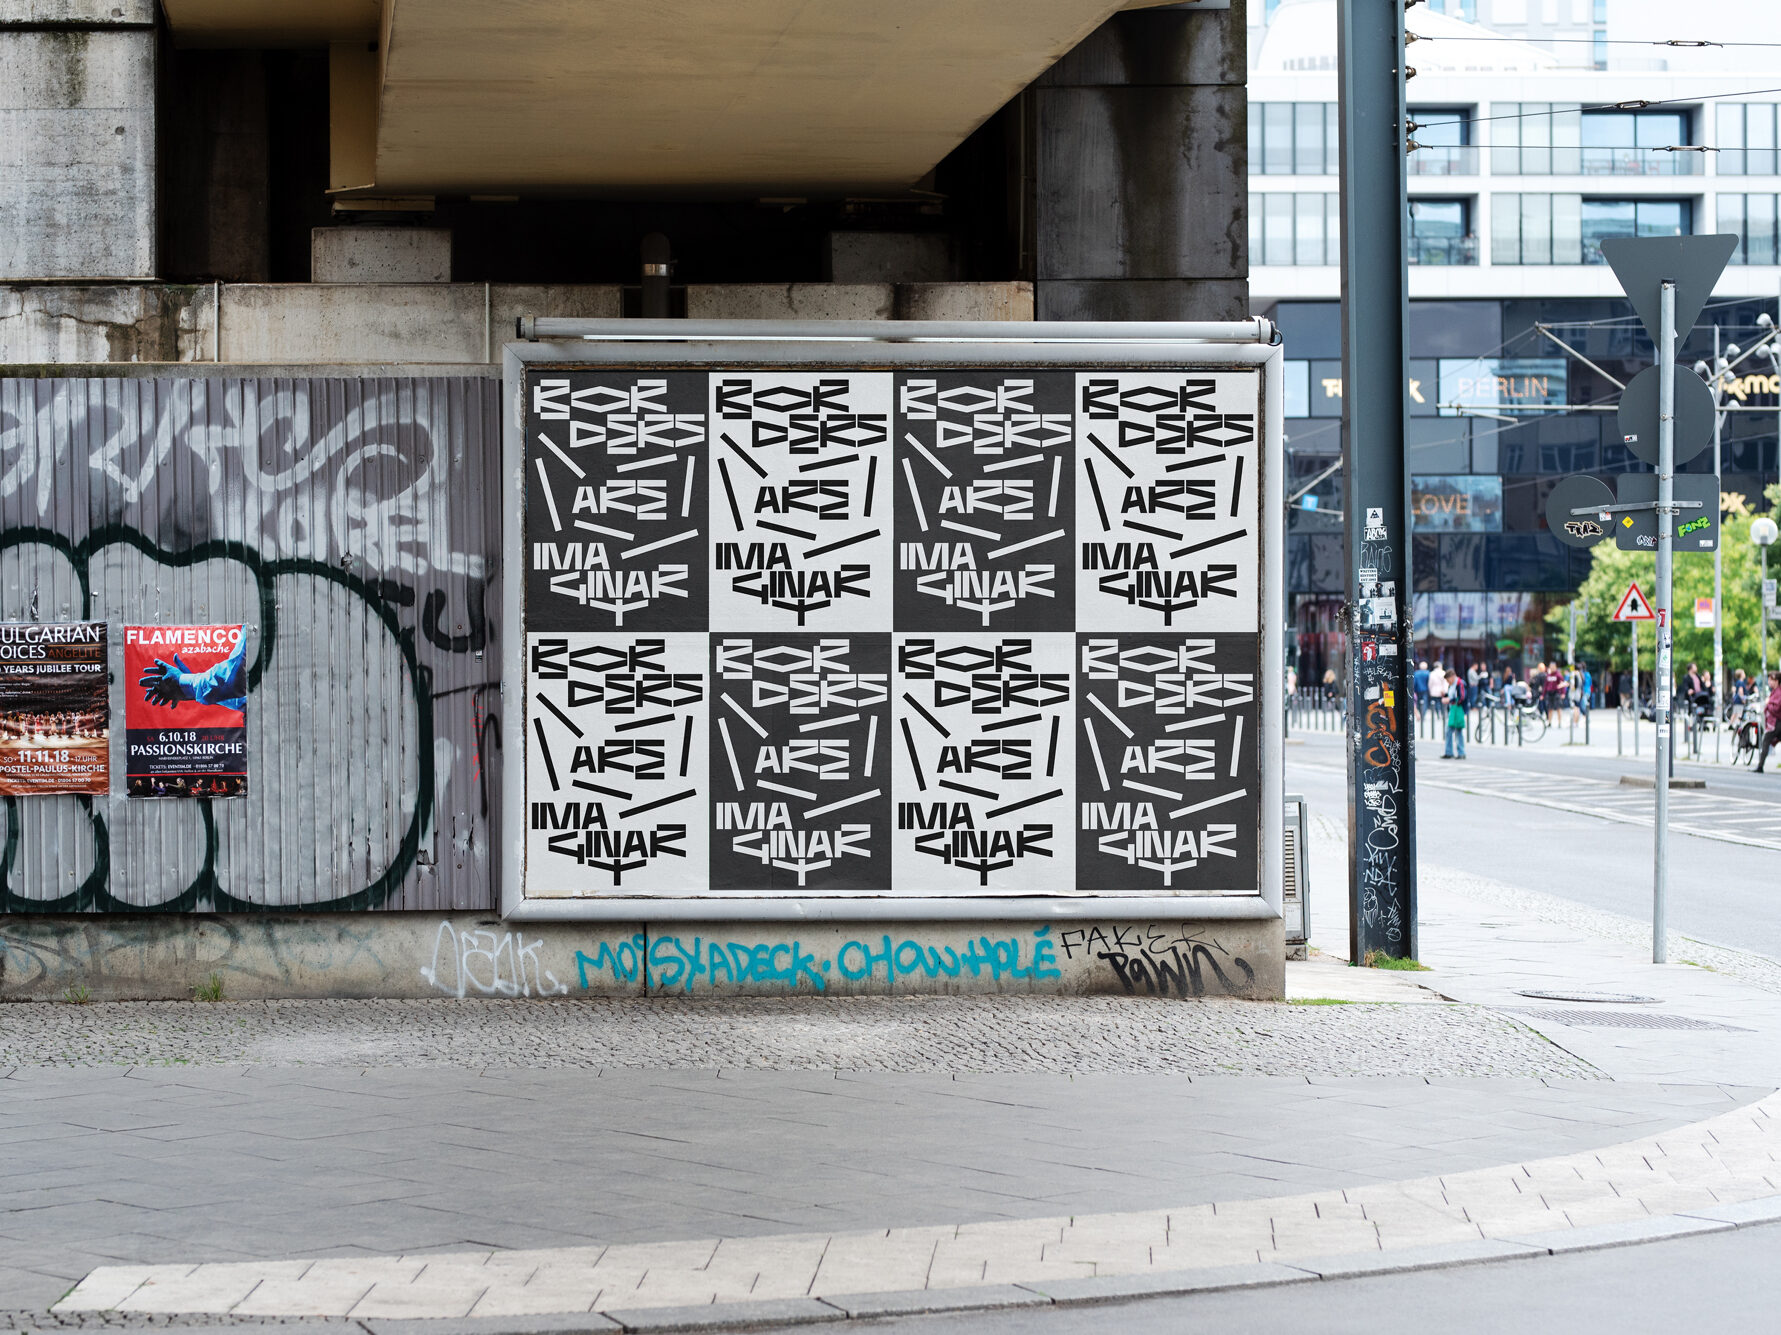
The CAA Method
In this course, you will learn how to design flexible systems for visual identities based on form. The 3-Step method “Components, Assets, Application” is the main approach in the book Flexible Visual Systems and according to my research the most popular in the field. Being able to design custom assets does not just help you design distinctive Visual Identities, it also speeds up your application process and opens it up to co-workers.
Lesson 1: Introduction
Lesson 2: What do I mean by …?
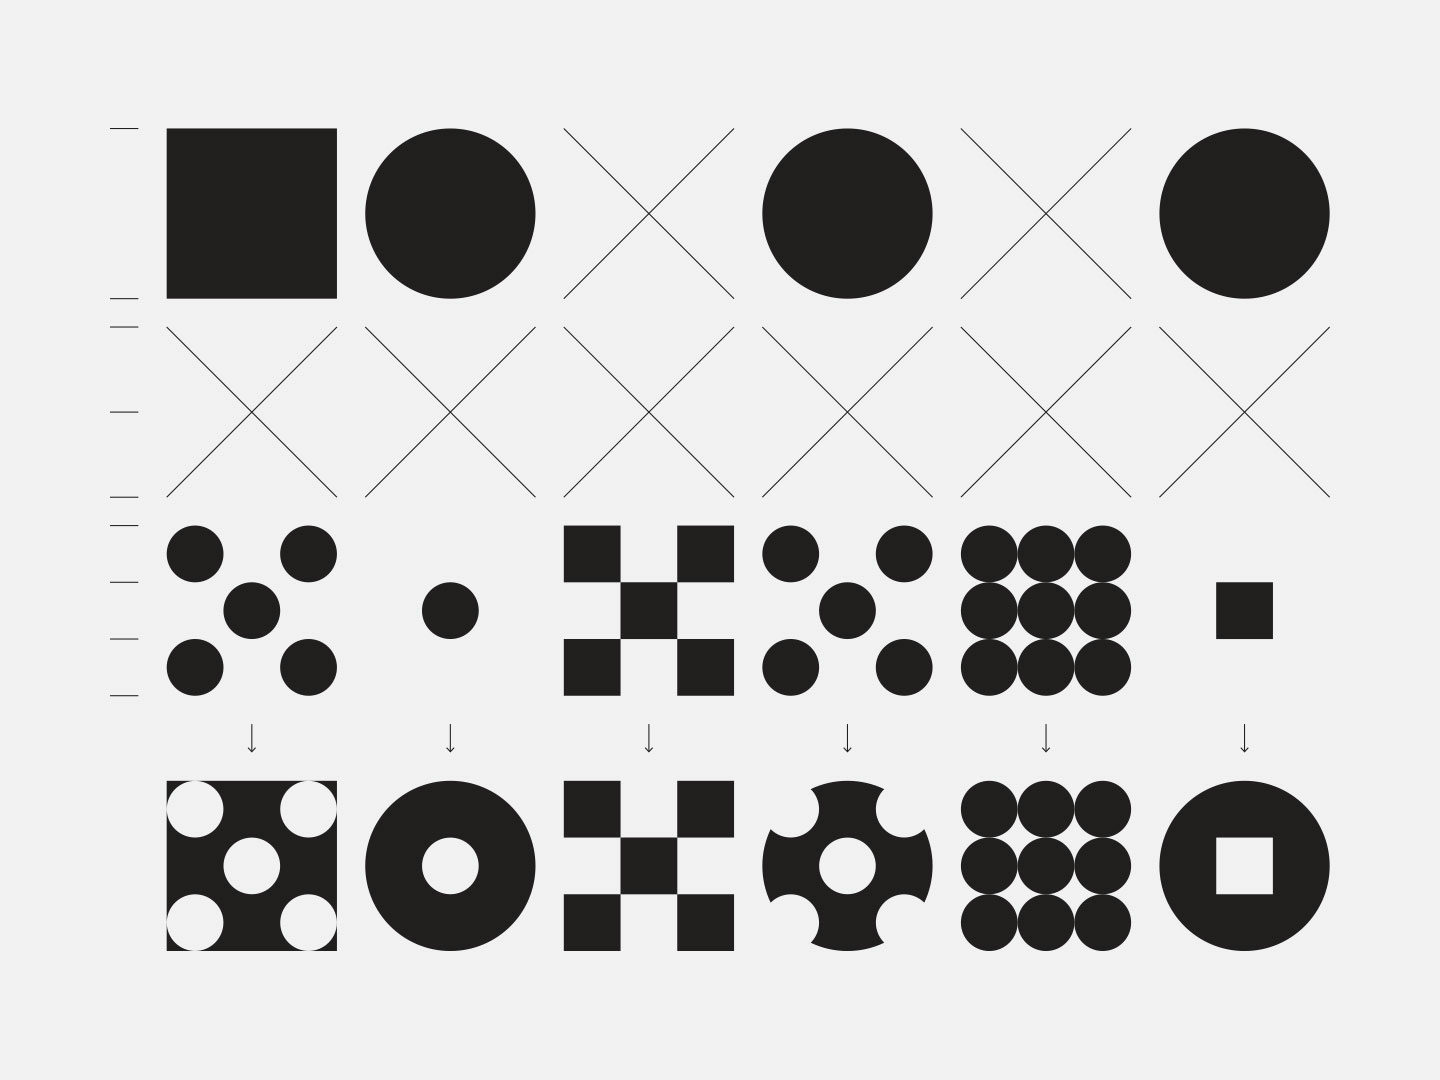
Lesson 3: Components
Lesson 4: Asset Symbols
Lesson 4.1: Asset Line
Lesson 4.2: Asset Frame
Lesson 4.3: Asset Shape
Lesson 4.4: Asset Letters
Lesson 4.5: Asset Pattern
Lesson 5: How to Apply Your Assets?
Lesson 6: Summing Up & Final Project
Lesson 1: Introduction
In this course, you will learn how to design flexible systems for visual identities based on form. The 3-Step method “Components, Assets, Application” is the main approach used in the book Flexible Visual Systems.
Lesson 2: What do I mean by …?
Before I show you how helpful this three-step approach to designing flexible visual systems is, let me explain some of the terms I am constantly using.
Lesson 3: Components
In this lesson, you will design your own custom component which you will use later to design your assets. Using your own components makes your visual identity distinctive.

Lesson 4: Asset Symbols
Assets are an efficient way to enable teamwork. But also if you are working alone you will see that you will be much faster by applying pre-build assets.
Lesson 4.1: Asset Line
The next asset we are going to build is a line because a line is nothing else than the one-directional repetition of a component.

Lesson 4.2: Asset Frame
Using the line assets from the last lesson and deleting components I am creating frames.

Lesson 4.3: Asset Shape
Shapes with characteristic edges are very useful assets too. I use them as masks and place illustrations, photos, or text inside of them. And they are soooooooo easy to make.

Lesson 4.4: Asset Letters
Using the components you designed, you can design a distinctive modular font.
Lesson 4.5: Asset Pattern
It is obvious, but patterns are a fantastic asset too. You can find them in any culture, they can be adapted to any format and application and are easy to build with just one component and a couple of colors.

Lesson 5: How to Apply Your Assets?
In each lesson, I already made suggestions on how you could use your assets. You might think that there are infinite ways how to apply them, but you know what? There are actually only four ways to apply your components and assets.
Lesson 6: Summing Up & Final Project
You made it! This is already the end of the course! Congratulations! Before I say goodbye and see you soon, I will sum up what we have done and how you could make use of it.
The CAA Method Explained
I am explaining in this footnote the dynamics of the design processes of form-based visual systems.
Stacked Components
In the CAA course, I am not discussing the possibility of stacking components. Here are a couple of case studies of visual identities using stacked components.

Lena Weber
In my book Flexible Visual Systems as well as the course The CAA Method I am working with basic geometric shapes to make keep the identities as generic as possible, so you would substitute them for other shapes. Lena shows you how to work with organic shapes.
Interview with Supermarket
At the beginning of the year, William McLean contacted me, and what he showed me blew my mind. Supermarket, the design studio he co-directs with Kernow Craig and Jeremy Walker, has built a design tool, based on the chapter about form-based systems in my book Flexible Visual Systems. It is so good, I had to interview them.
Modular Type Design Course
Designing Flexible Type Systems is my favorite thing to do. In this course, I am giving you a general introduction to type design, and then show you how I develop Modular Type Systems for Flexible Visual Identities. This course opens up a million things you can do with type.
Lesson 1: Amuse Gueule
Lesson 2: Form Follows Function
Lesson 3: Form Follows Function II
Lesson 4: Form Follows Tool
Lesson 5: Form Follows Grid, Part 1
Lesson 6: Form Follows Grid, Part 2
Lesson 7: Form Follows Grid, Part 3
Lesson 8: The Grid of Tp ESPN Next
Lesson 9: Components First
Lesson 10: Summing Up & Final Project


Lesson 1: Amuse Gueule
This is the fourth course I developed for FlexibleVisualSystems.info!!! To celebrate this milestone I am releasing the first lesson of this course for free for everyone! It is an Amuse Gueule that hopefully motivates you to keep on studying systems in type design.
Lesson 2: Form Follows Function
I hope you enjoyed the first lesson and are ready to dive into a deeper understanding of typography, type design, and lettering. When I say “deeper” I refer to everything you need to know about systematic type design in general and modular letter design.

Lesson 3: Form Follows Function II
Let us look in this lesson at a more detailed distinction between different types of fonts, and the new DIN classification. It is really helpful to learn something about the architecture of letters and their readability.

Lesson 4: Form Follows Tool
In this lesson I will explain the theory of Gerrit Noordzij, which is easy to understand, and therefore a very powerful tool for teachers and students alike.
Lesson 5: Form Follows Grid, Part 1
In the last lesson, you learned about how Form Follows Tools and the theory of Gerrit Noordzij. One of the most important lessons in type design. Learning to use or make a writing tool is a very interesting subject I might explore in another Footnote Article or FVS Course. But we have a task we must focus on Modular Type Design.
Lesson 6: Form Follows Grid, Part 2
In this lesson, I would like to have a look at grids. What are they good for? What is the right kind of grid? Are there more than just grids made of squares and rectangles?
Lesson 7: Form Follows Grid, Part 3
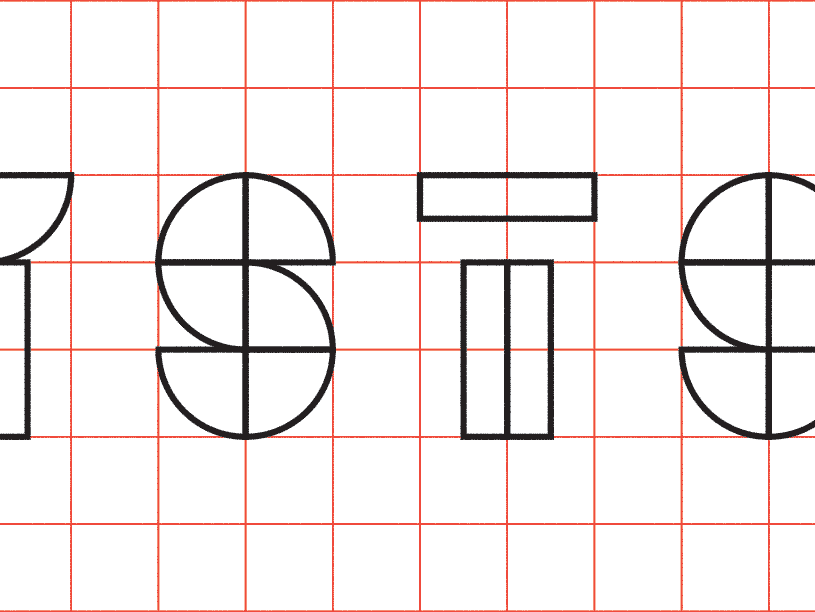
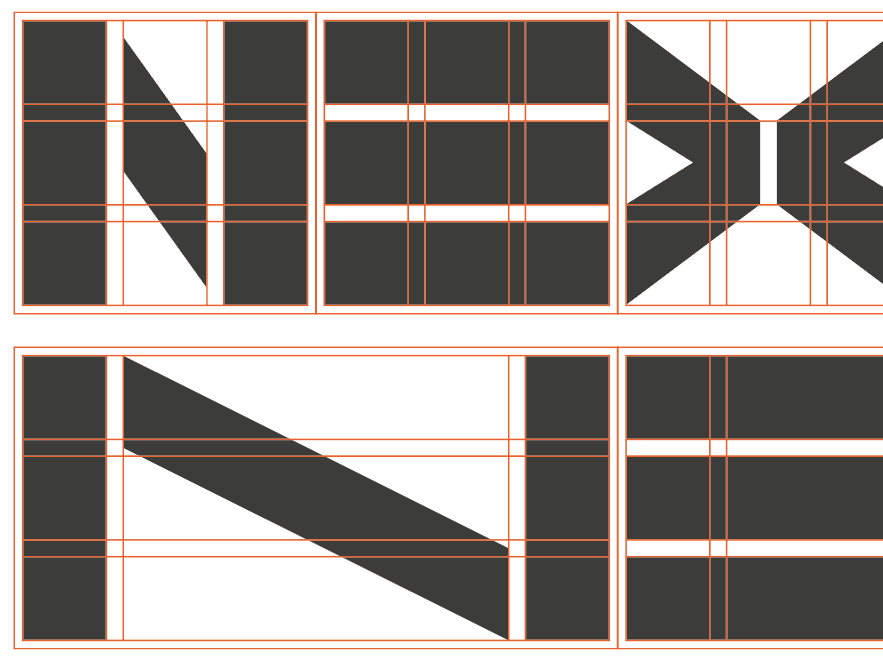
In part three of the Form Follows Grid lessons of the Modular Type course, I will summarize the modular approach to type design from my book Flexible Visual Systems. Paying attention to the details of the components is a beautiful way of making complex lettering with relatively simple letter structures. This approach lets you use your component creation skills from the CAA (Components, Assets, Application) course.
Lesson 8: The Grid of Tp ESPN Next
In the last lesson, I showed you grids that are built by the repetition of triangles or squares of the same size. In this lesson, I will show you a grid that works with modules of different sizes to obtain column and row gaps. I will also show you how diagonals need optical corrections in a rectangle grid to appear of similar weight.
Lesson 9: Components First
In the last lesson, I showed you a grid with column and row gaps, how the design of the font emerged out of the grid, and how the grid helped to establish consistency. In this lesson, I will show you that you do not need a grid to achieve consistency.
Lesson 10: Summing Up
In this last lesson of the Modular Type Design course, I will sum up what you have learned so far. If you are not sure if you really explored all the possibilities of a lesson or exercise, I recommend going back and redoing the lesson or exercise. You learn the most from doing, not reading. At the end of this last lesson, I will give you inspiration where you could take your new (embodied) knowledge.

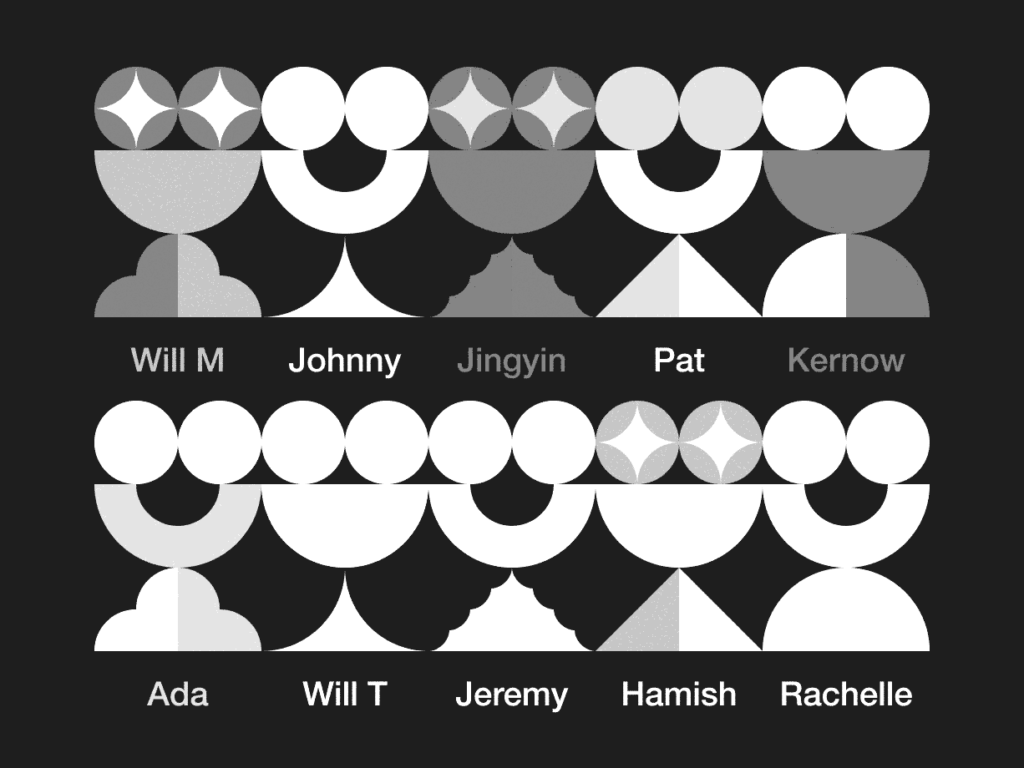
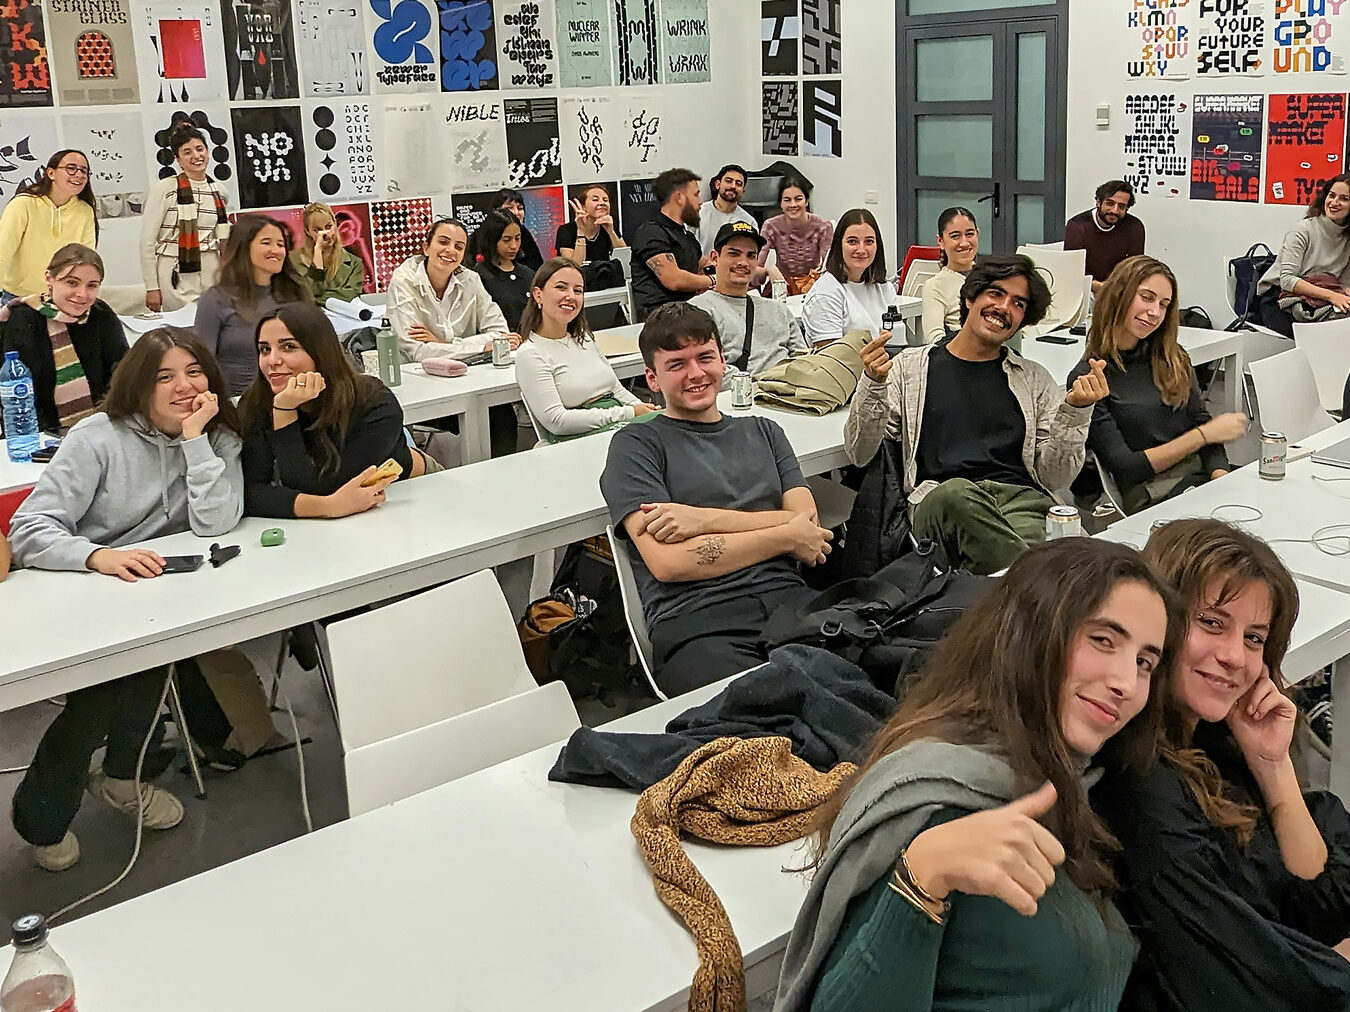
Interview with the Elisava Master students
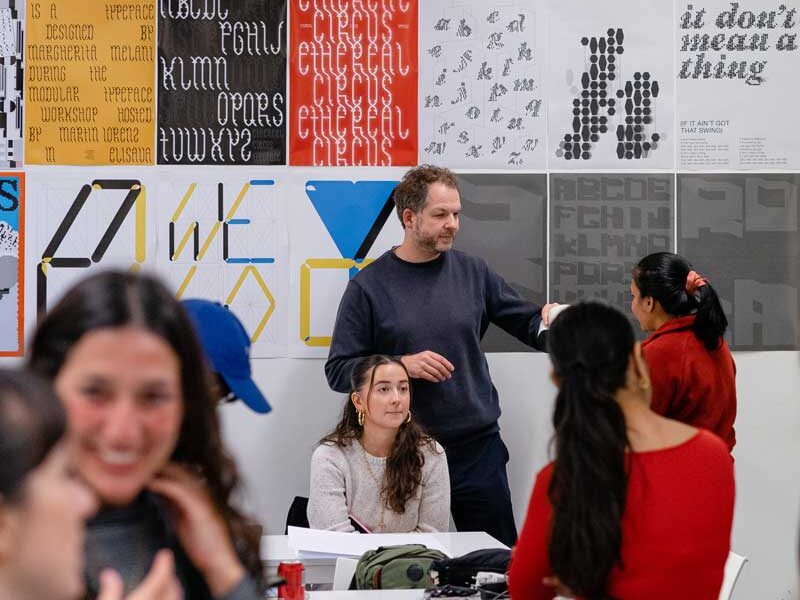
Since 2006 I have taught at the prestigious Barcelona design school ELISAVA, and even co-directed a Postgraduate Degree. At the Master of Visual Design, led by Marc Panero, I have taught since 2020 a fun workshop on Systemic Type Design. Although we just have 5 days, the results are always beyond everyone’s expectations.
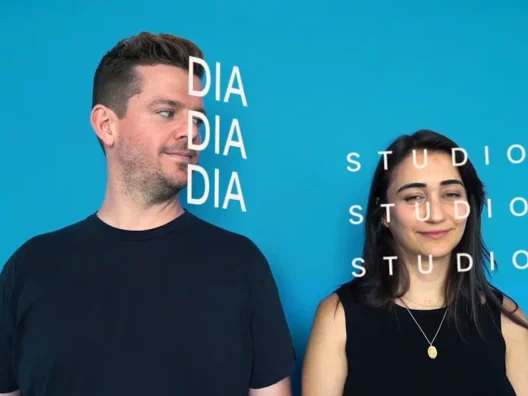
Interview with Mitch from Dia
DIA is a Brooklyn-based creative studio specializing in kinetic identity systems, graphic design, and typography. The core team are Mitch Paone, Meg Donohoe, and Deanna Sperrazza. With clients ranging from Nike and Samsung to the U.N., DIA’s work has reached international fame through its unique mixture of traditional and kinetic typography.

Interview with Felix from Feixen
Felix Pfäffli, who founded Studio Feixen in 2009. Felix teaches at the Fachklasse Grafik Luzern and is the youngest member in the history of AGI. Besides winning prizes worldwide, he has also given lectures and organized exhibitions and workshops. In his own words, he is responsible for the “necessary chaos” in Studio Feixen’s designs.
Modular Type Design
… with the Students of Elisava’s Master of Visual Design 2023/24. One of my favorite weeks of the year is the week I am spending with the wonderful students of the ELISAVA Master of Visual Design, directed by Marc Panero. I have taught this fun workshop on Systemic Type Design since 2020; it is becoming more fun every year.
Modular Type Design
Another year, another fun workshop with the wonderful students of the ELISAVA Master of Visual Design. As every year, I interviewed a couple of them, and this year I even had to make two pages. This is page one.
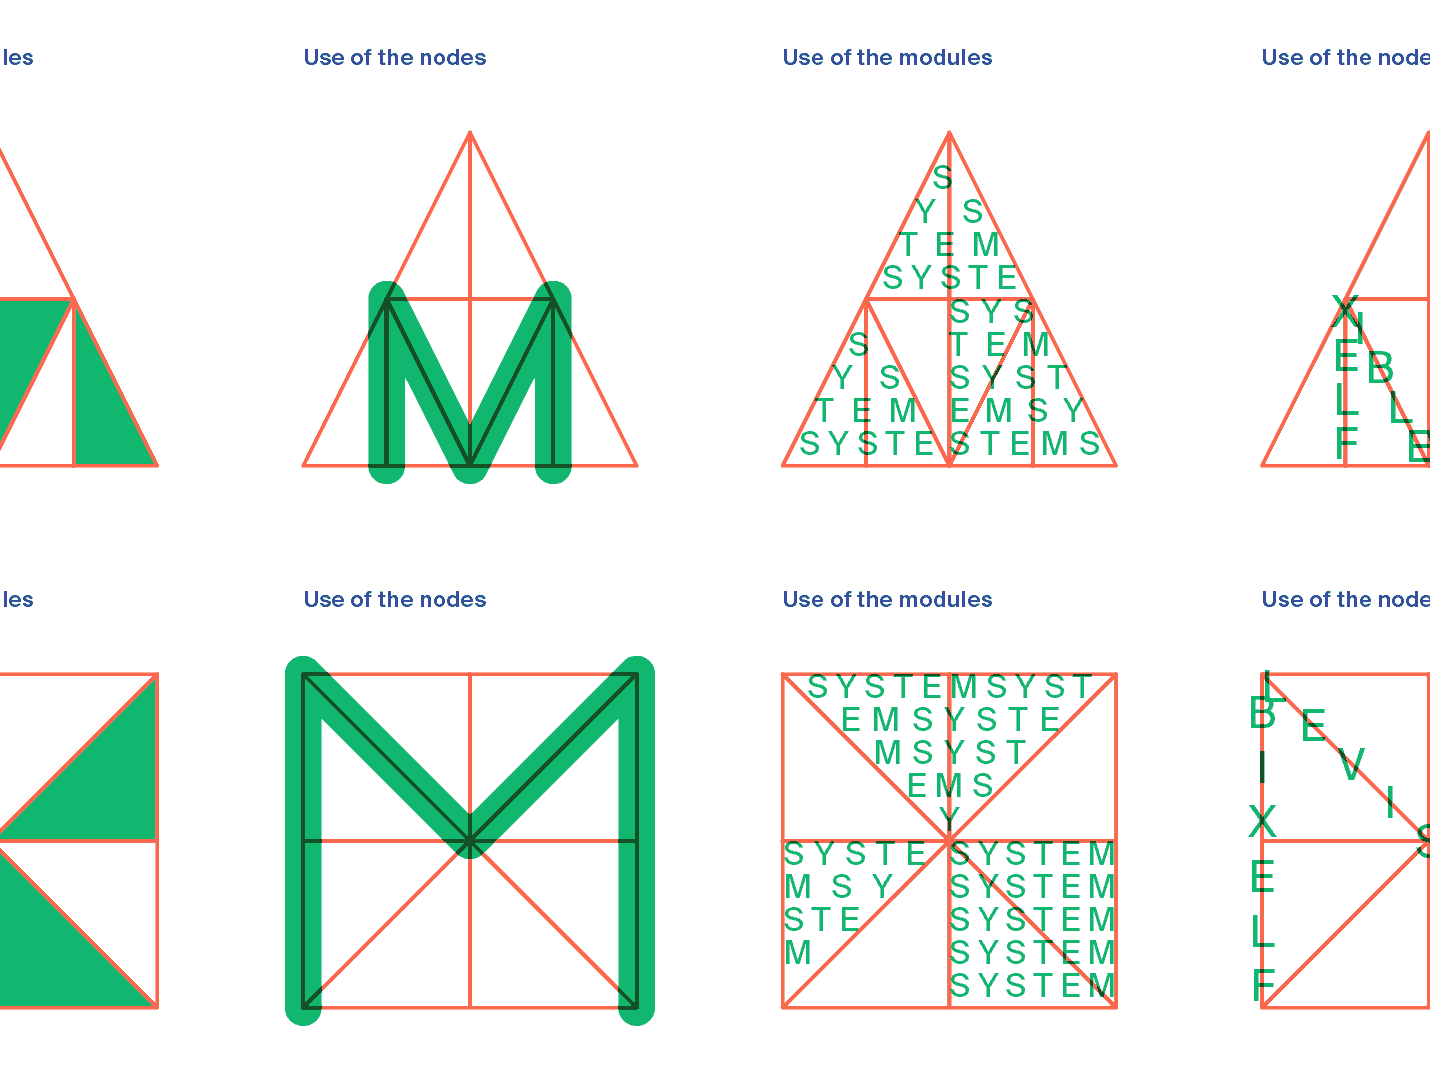
Grids as Transformational Tools
If you are new to Flexible System Design, the course “Grids as Transformational Tools — How Grids Can Become Visual Identities” will give you a whole new perspective on System Design.
Lesson 1: Introduction
Lesson 2: Making a grid with a circle
Lesson 3: Making a grid with a triangle
Lesson 4: Making a grid with a square
Lesson 5: Making a three-dimensional grid
Lesson 6: Using the grid as a transformational tool
Lesson 7: Focusing on masks
Lesson 8: Focusing on typography
Lesson 9: Multi-layered design
Lesson 10: Summing up & Final Assignment

Lesson 1: Introduction
If you are new to Flexible System Design, the course “Grids as Transformational Tools — How Grids Can Become Visual Identities” will give you a whole new perspective on System Design.
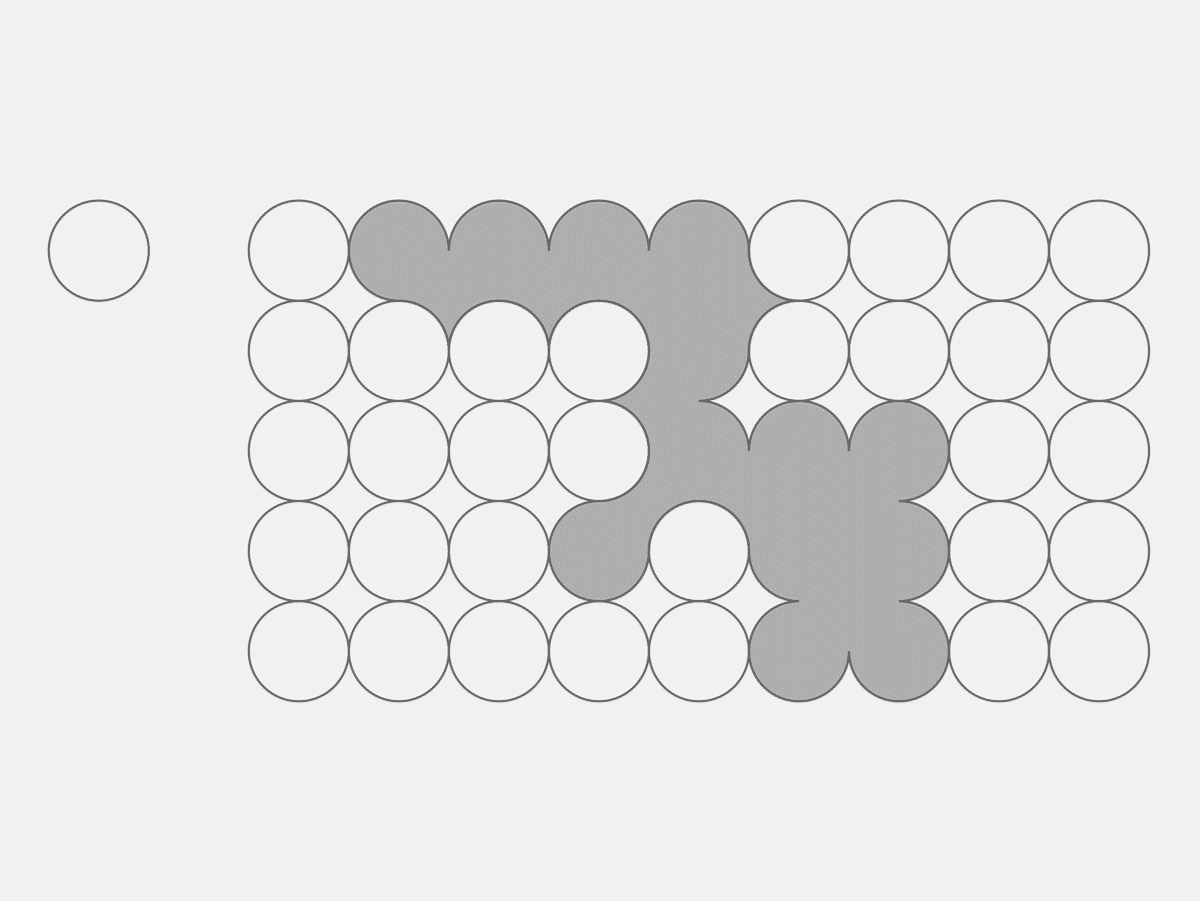
Lesson 2: Making a grid with a circle
Let’s begin. The initial step is to create a grid using shapes. I’ll begin with a circle. By the way, I’m using Adobe Illustrator, but feel free to utilize any tool you prefer. What I’m teaching is an approach, not a specific tool.
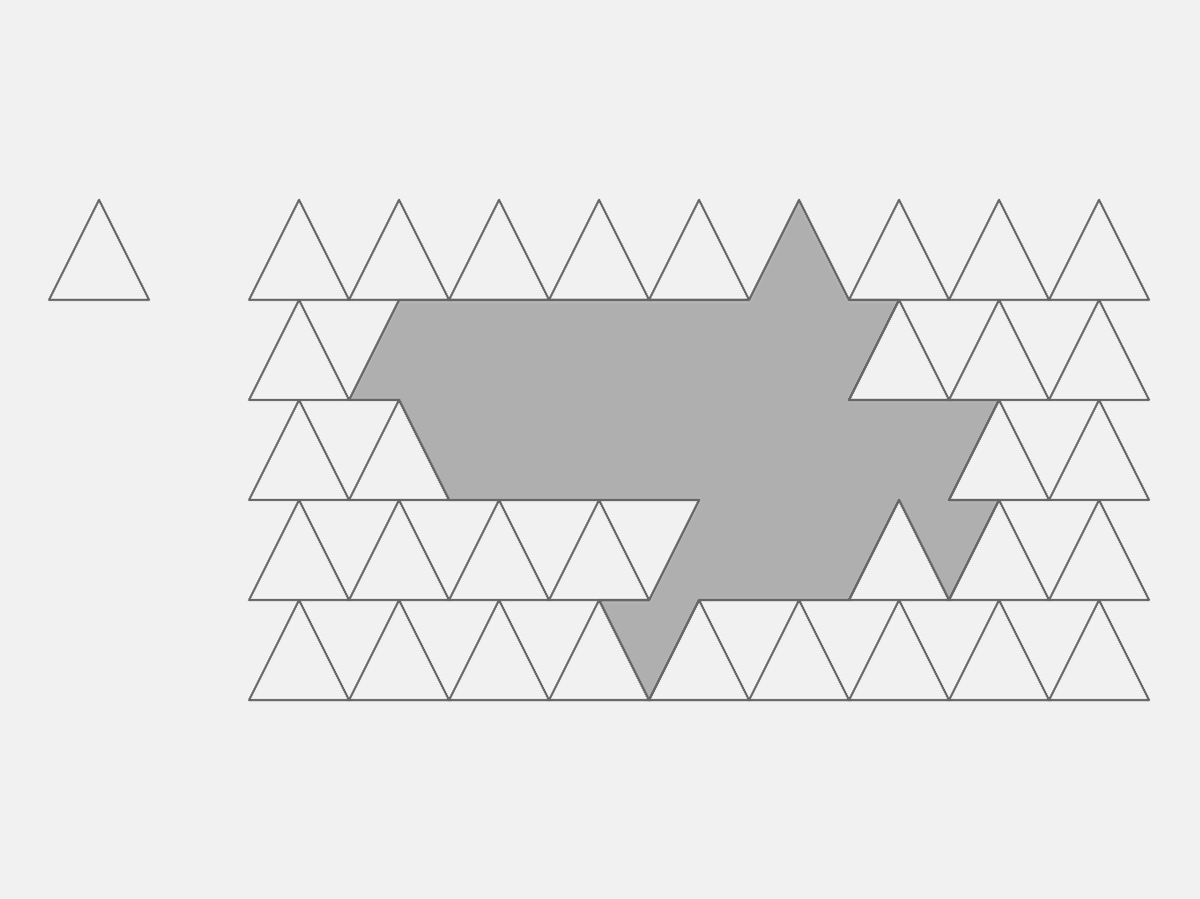
Lesson 3: Making a grid with a triangle
Lesson 2 was fun! Let’s experiment with a couple more shapes to make grids. As in my book, I am going to stick to geometric shapes because they are easy to work with. I recommend reproducing my grids first but then feel free to make your own. Try either a different position, repetition, or even shape. In this lesson, I will work with a triangle.
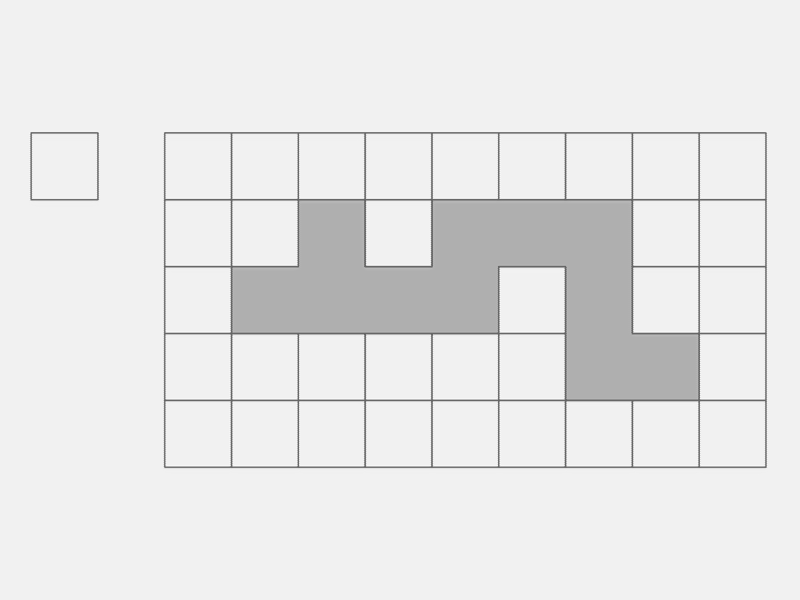
Lesson 4: Making a grid with a square
We arrived at the last lesson using a geometric shape to create grids and patterns. In this lesson, we are going to experiment with a square. It might seem the most boring of shapes but don’t underestimate its potential.
Lesson 5: Making a Three-Dimensional Grid
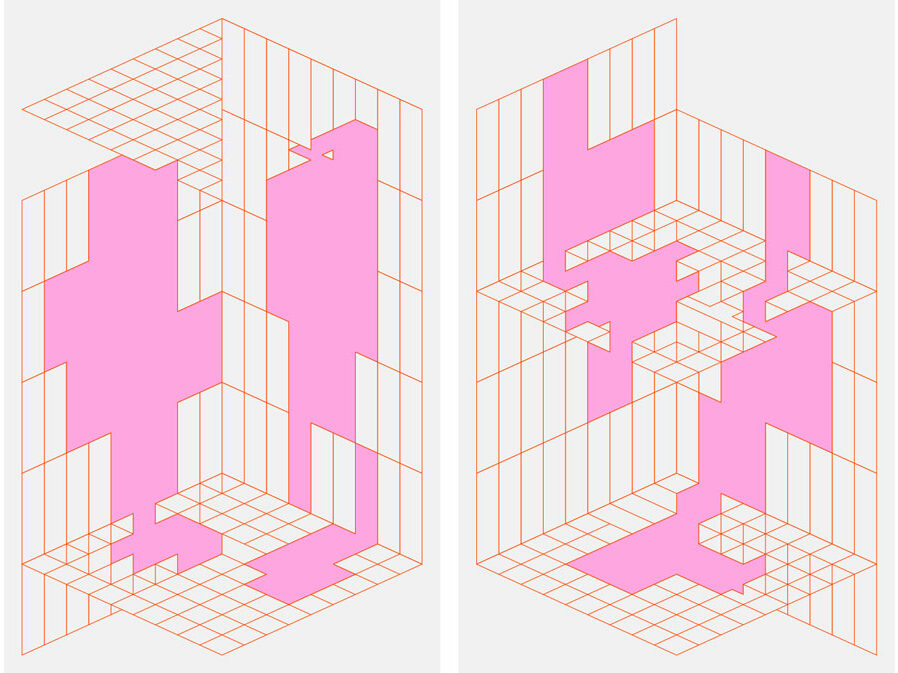
In the past lessons, we have prepared various two-dimensional grids. It is time to enter the lesser-used third dimension and create more distinctive grids. As you already know, “distinctiveness” is the secret to a unique Visual Identity—an Identity that stands out and is recognized.
Lesson 6: Using the Grid as a Transformational Tool
In the previous lessons, we prepared grids based on circles, triangles, and squares and even took them to the third dimension. Any of these lessons could be the beginning of the development of a Visual Identity. The part that has been missing so far is how to use the grids. Let’s dive into this part of the project now.
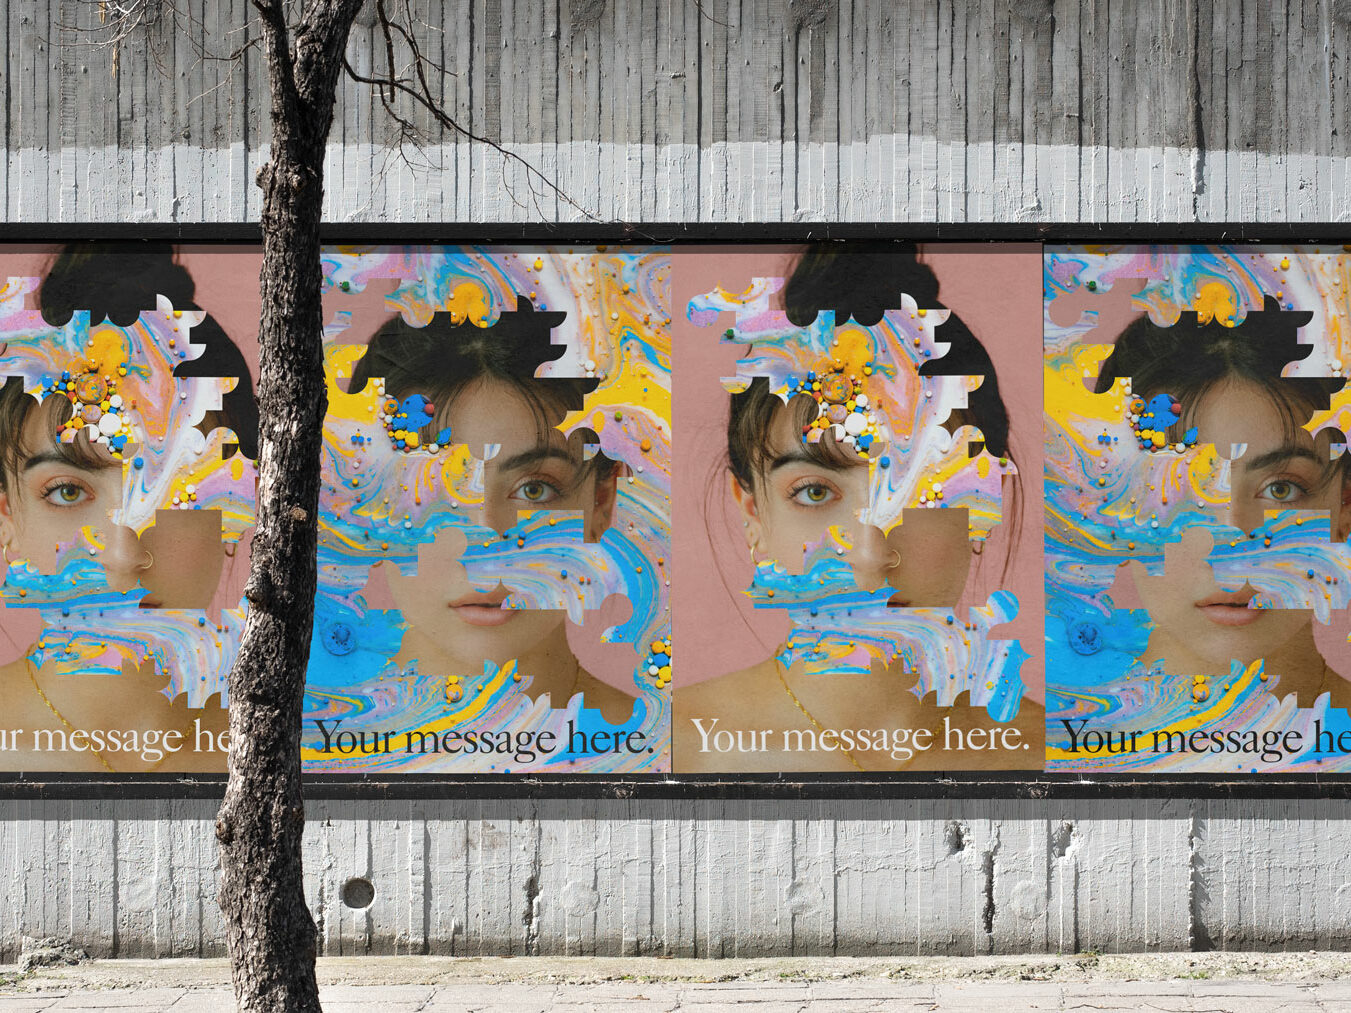
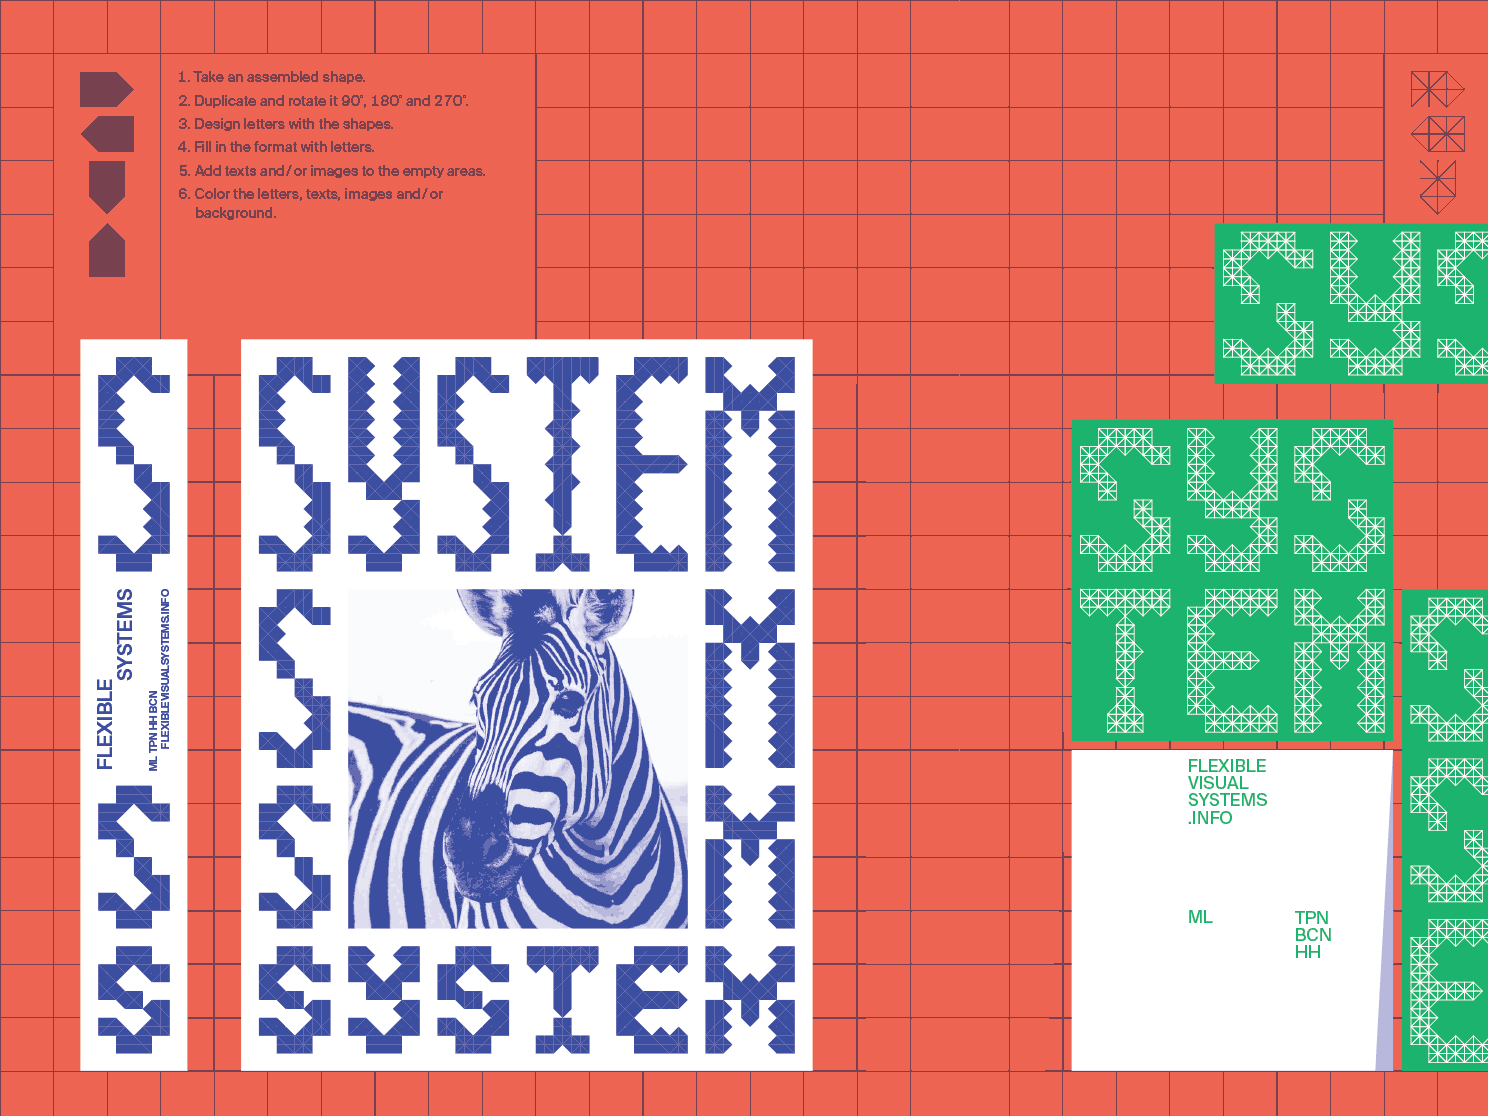
Lesson 7: Focusing on Masks
We have learned in the previous lessons how to make grids and how to use them to generate distinctive shapes, which become the identification element of visual identity. It is important to repeat that we have designed a design process, not a library of assets. By drawing the shape every time from scratch, the shape can respond to each deliverable’s formal and semantic needs. This gives you much more creative freedom. You can draw shapes that play with the format you are working on and the communication concept your Identity follows. In this lesson, I want to show you a couple of communication concepts that appear when using distinctive shapes as masks for images.

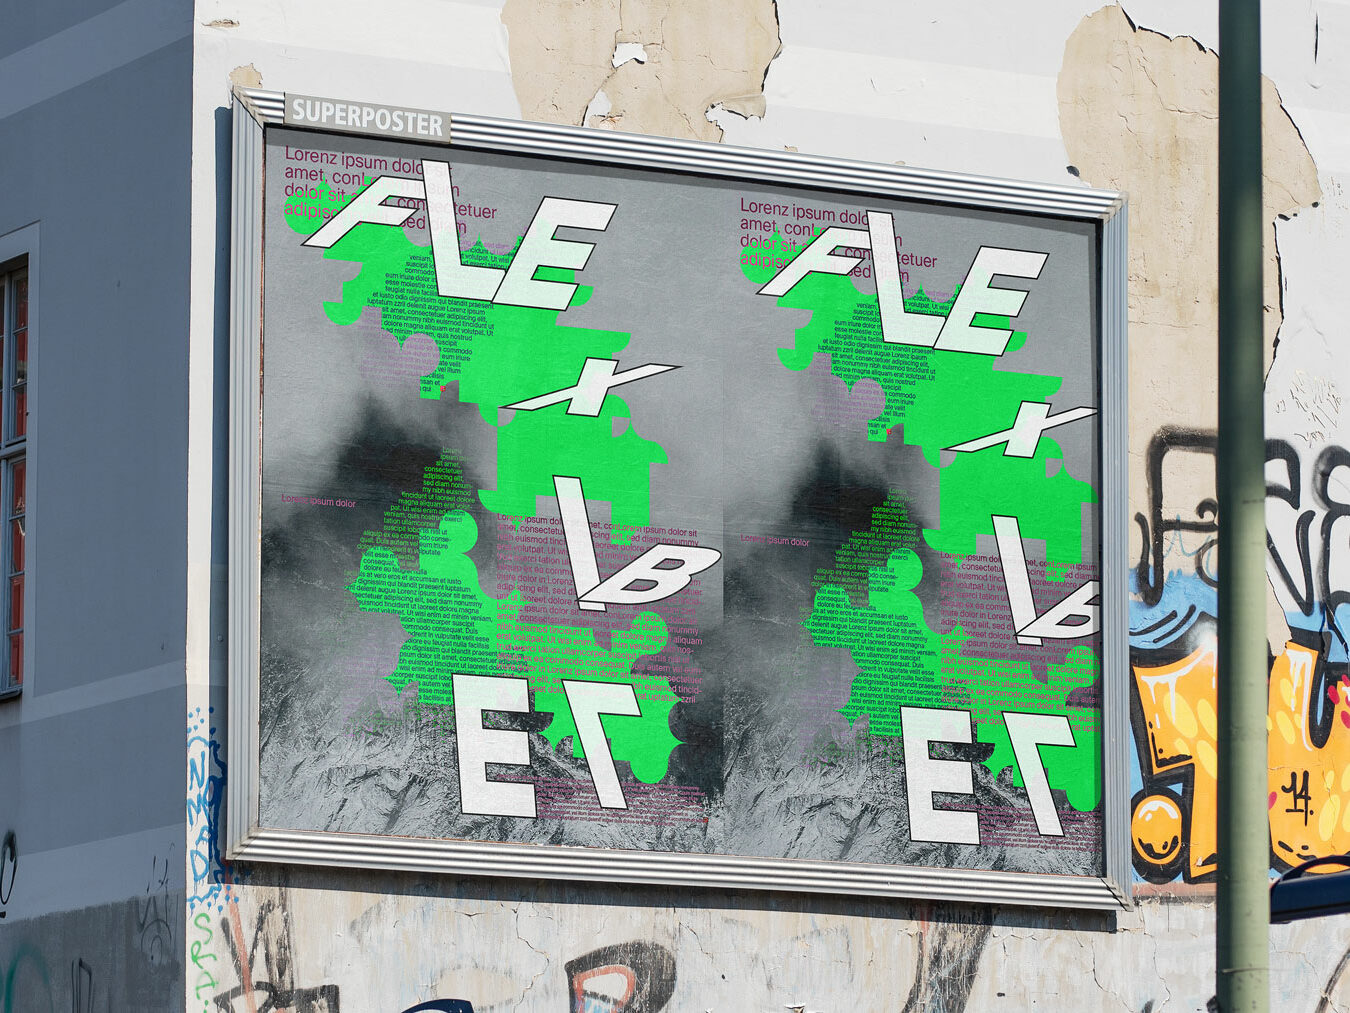
Lesson 8: Focusing on Typography
In the previous lesson we used the shapes, which derived from the grids, as masks for images. In this lesson we will focus on the possibilities we have with typography. At least some of them. There is always room for further exploration and I am curious about what you will come up with.
Lesson 9: Multi-Layered Designs
In 2011, we, TwoPoints.Net, made a book called “Pretty Ugly.” It documented a “rebellious” movement that challenged functional, easy-to-the-eye design. The bad, ugly, amateurish, and dysfunctional were elevated to a new beauty. A rebellion that stopped being a rebellion when it opened new spaces of exploration and perception.
Lesson 10: Summing Up
You made it! You completed the course “Grids as Transformational Tools.” It took us several weeks, in some cases even months, to learn, reflect, and experiment. The more time you took, the more possibilities opened up to you. A couple of great ideas might have got lost. To remember them and also make you proud about what you have learned, I will sum up in this lesson what we have done in the course.
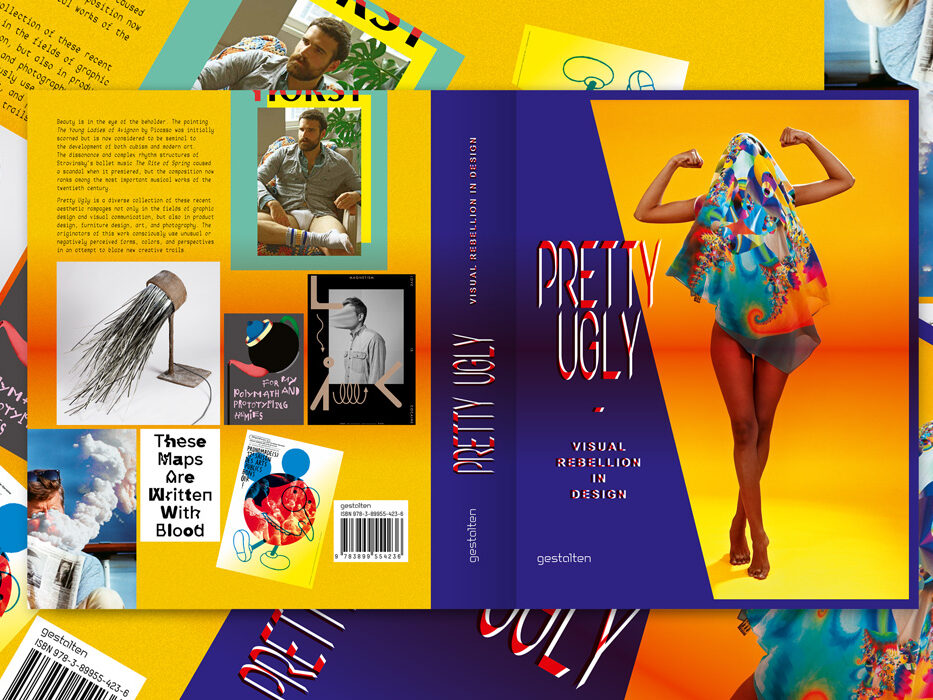
Footnote Interview: Pretty Ugly
There are moments when leafing through the pages of Pretty Ugly, that you’ll feel a little perplexed. Not by the stretched and layered type that practitioners of the New Ugly graphics movement use to obscure the messages contained in their work, nor by the fact that brands and organizations are trying to sell themselves with these deliberately obtuse images. What you’ll find so confusing, rather, is just how beautiful most of the projects appear, despite their creators’ best attempts at visual rebellion.
Modular Variable Fonts
Emergent Identities With Variable Font Design
Sometimes learning a workflow can set your creativity free. In this course I show you my latest workflow when I design modular variable fonts, which I often design when I need to design emergent identity systems. It has all the advantages of a form-based identity system, but on top of that it is packed in a software that can be installed on any computer, which makes the application of the system very easy. Designing a font is designing a tool.
Lesson 1: Intro + Set up
Lesson 2: Emergent Opportunities + Sketching
Lesson 3: Components, Letters
Lesson 4: Draw the whole f alphabet + Editing
Lesson 5: Variable Fonts Set Up
Lesson 6: Making the component variable
Lesson 7: Making the letters variable
Lesson 8: Testing the font
Lesson 9: Using the font, with mouse, sound, scroll, etc. (WordPress, Webflow, Cargo, …)
Lesson 10: Emergent + Evolving Identities. Starting simple, changing components, sharing font, …
Lesson 1: Introduction and Set Up
The world of modular variable fonts. In contrast to the course Modular Type Design, I won’t explain the basics but jump directly into hands-on lessons. So, if you haven’t taken the Modular Type Design course yet, I recommend you do that first.

Lesson 2: Emergent Opportunities
In lesson 1, I mentioned a couple of terms that need explaining: Form-Based System, Modular Variable Font, and Emergent Identity. Before we start sketching our font, I need to elaborate on the mentioned terms because they give you the perspective you need to understand that your font can be more than just a font.
Lesson 3: Components & Letters
In the last lesson, I discussed concepts relevant to this course. Zooming out into the macro to see the opportunities the micro gives you was essential. This is a lesson I learned in life: Don’t become a Creative Director who does not understand what the Art Director and Designer do. Creativity is not a top-down process.

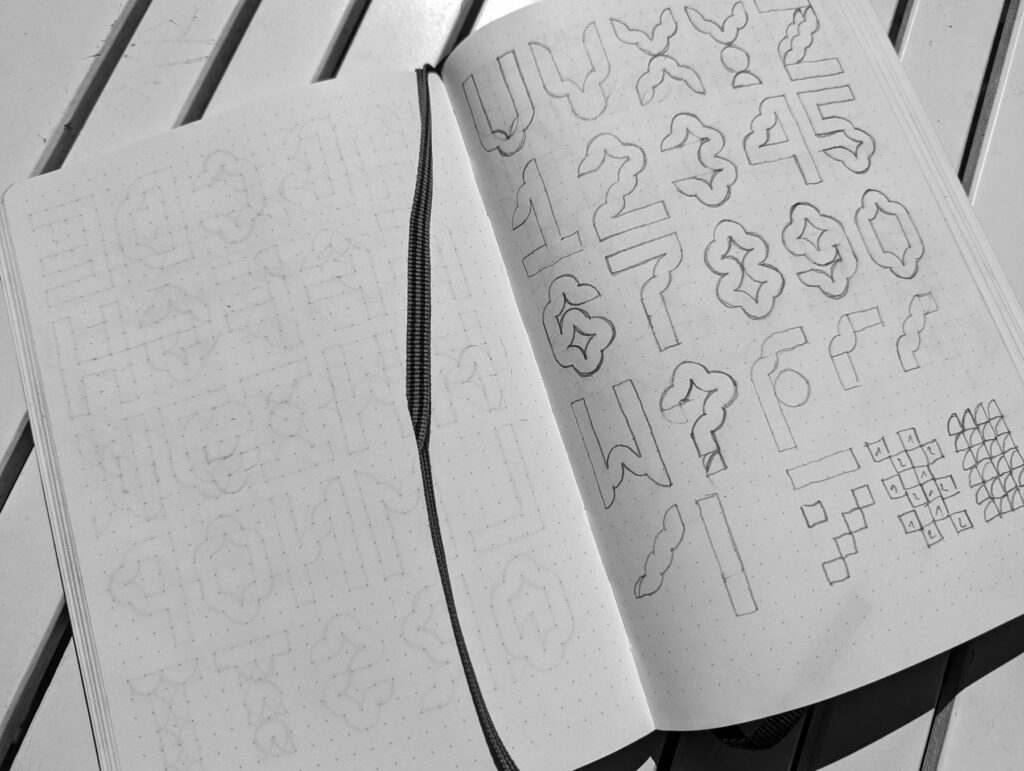
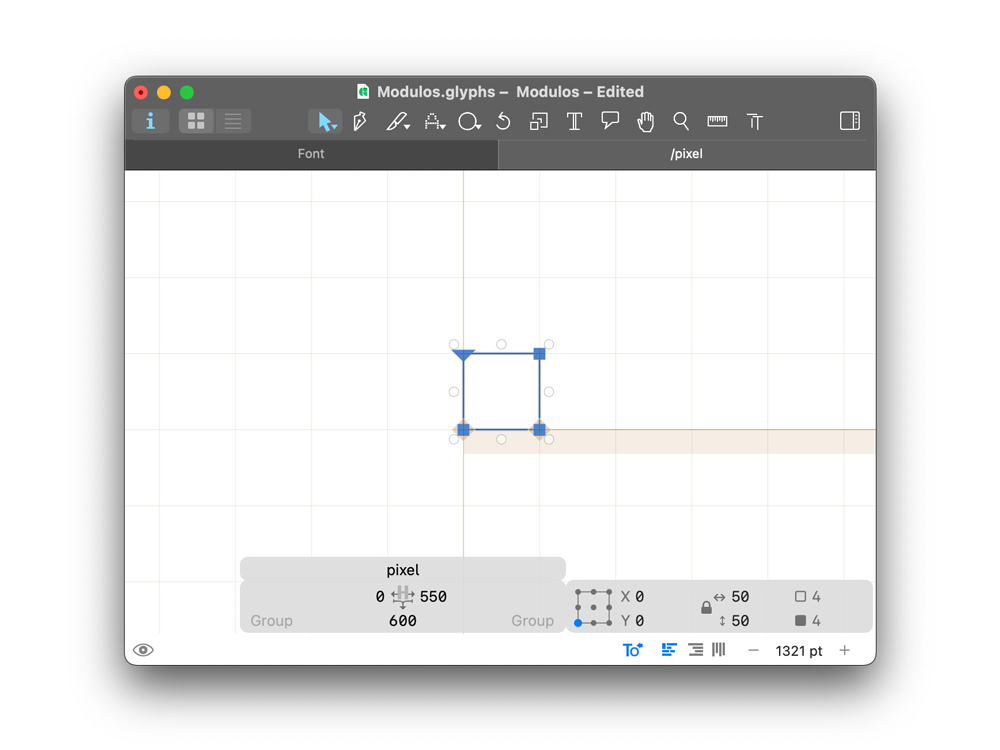
Lesson 4: Draw the whole f****** font
In the last lesson, you learned how to draw a letter with the pixel tool. Now, I will show you what to consider when drawing your entire font.
What’s Next?
Thanks to my lovely Patrons, I can work on new courses. All new releases will be communicated through my Patreon newsletter. Sign up, enjoy all the exclusive content, and help me keep on developing new material!
Thank you!
Martin
🙂